
Electric Finn Express 83 Sailboat Refurbishment and Battery Refit
written by Bernard Spiegl
TL;DR We had an old sailboat with mouldy interior, dated sails and worn out batteries, and we managed to fix it up, quite a bit I suppose! :-) (jump to Before / After section to see the final outcome)
Overview
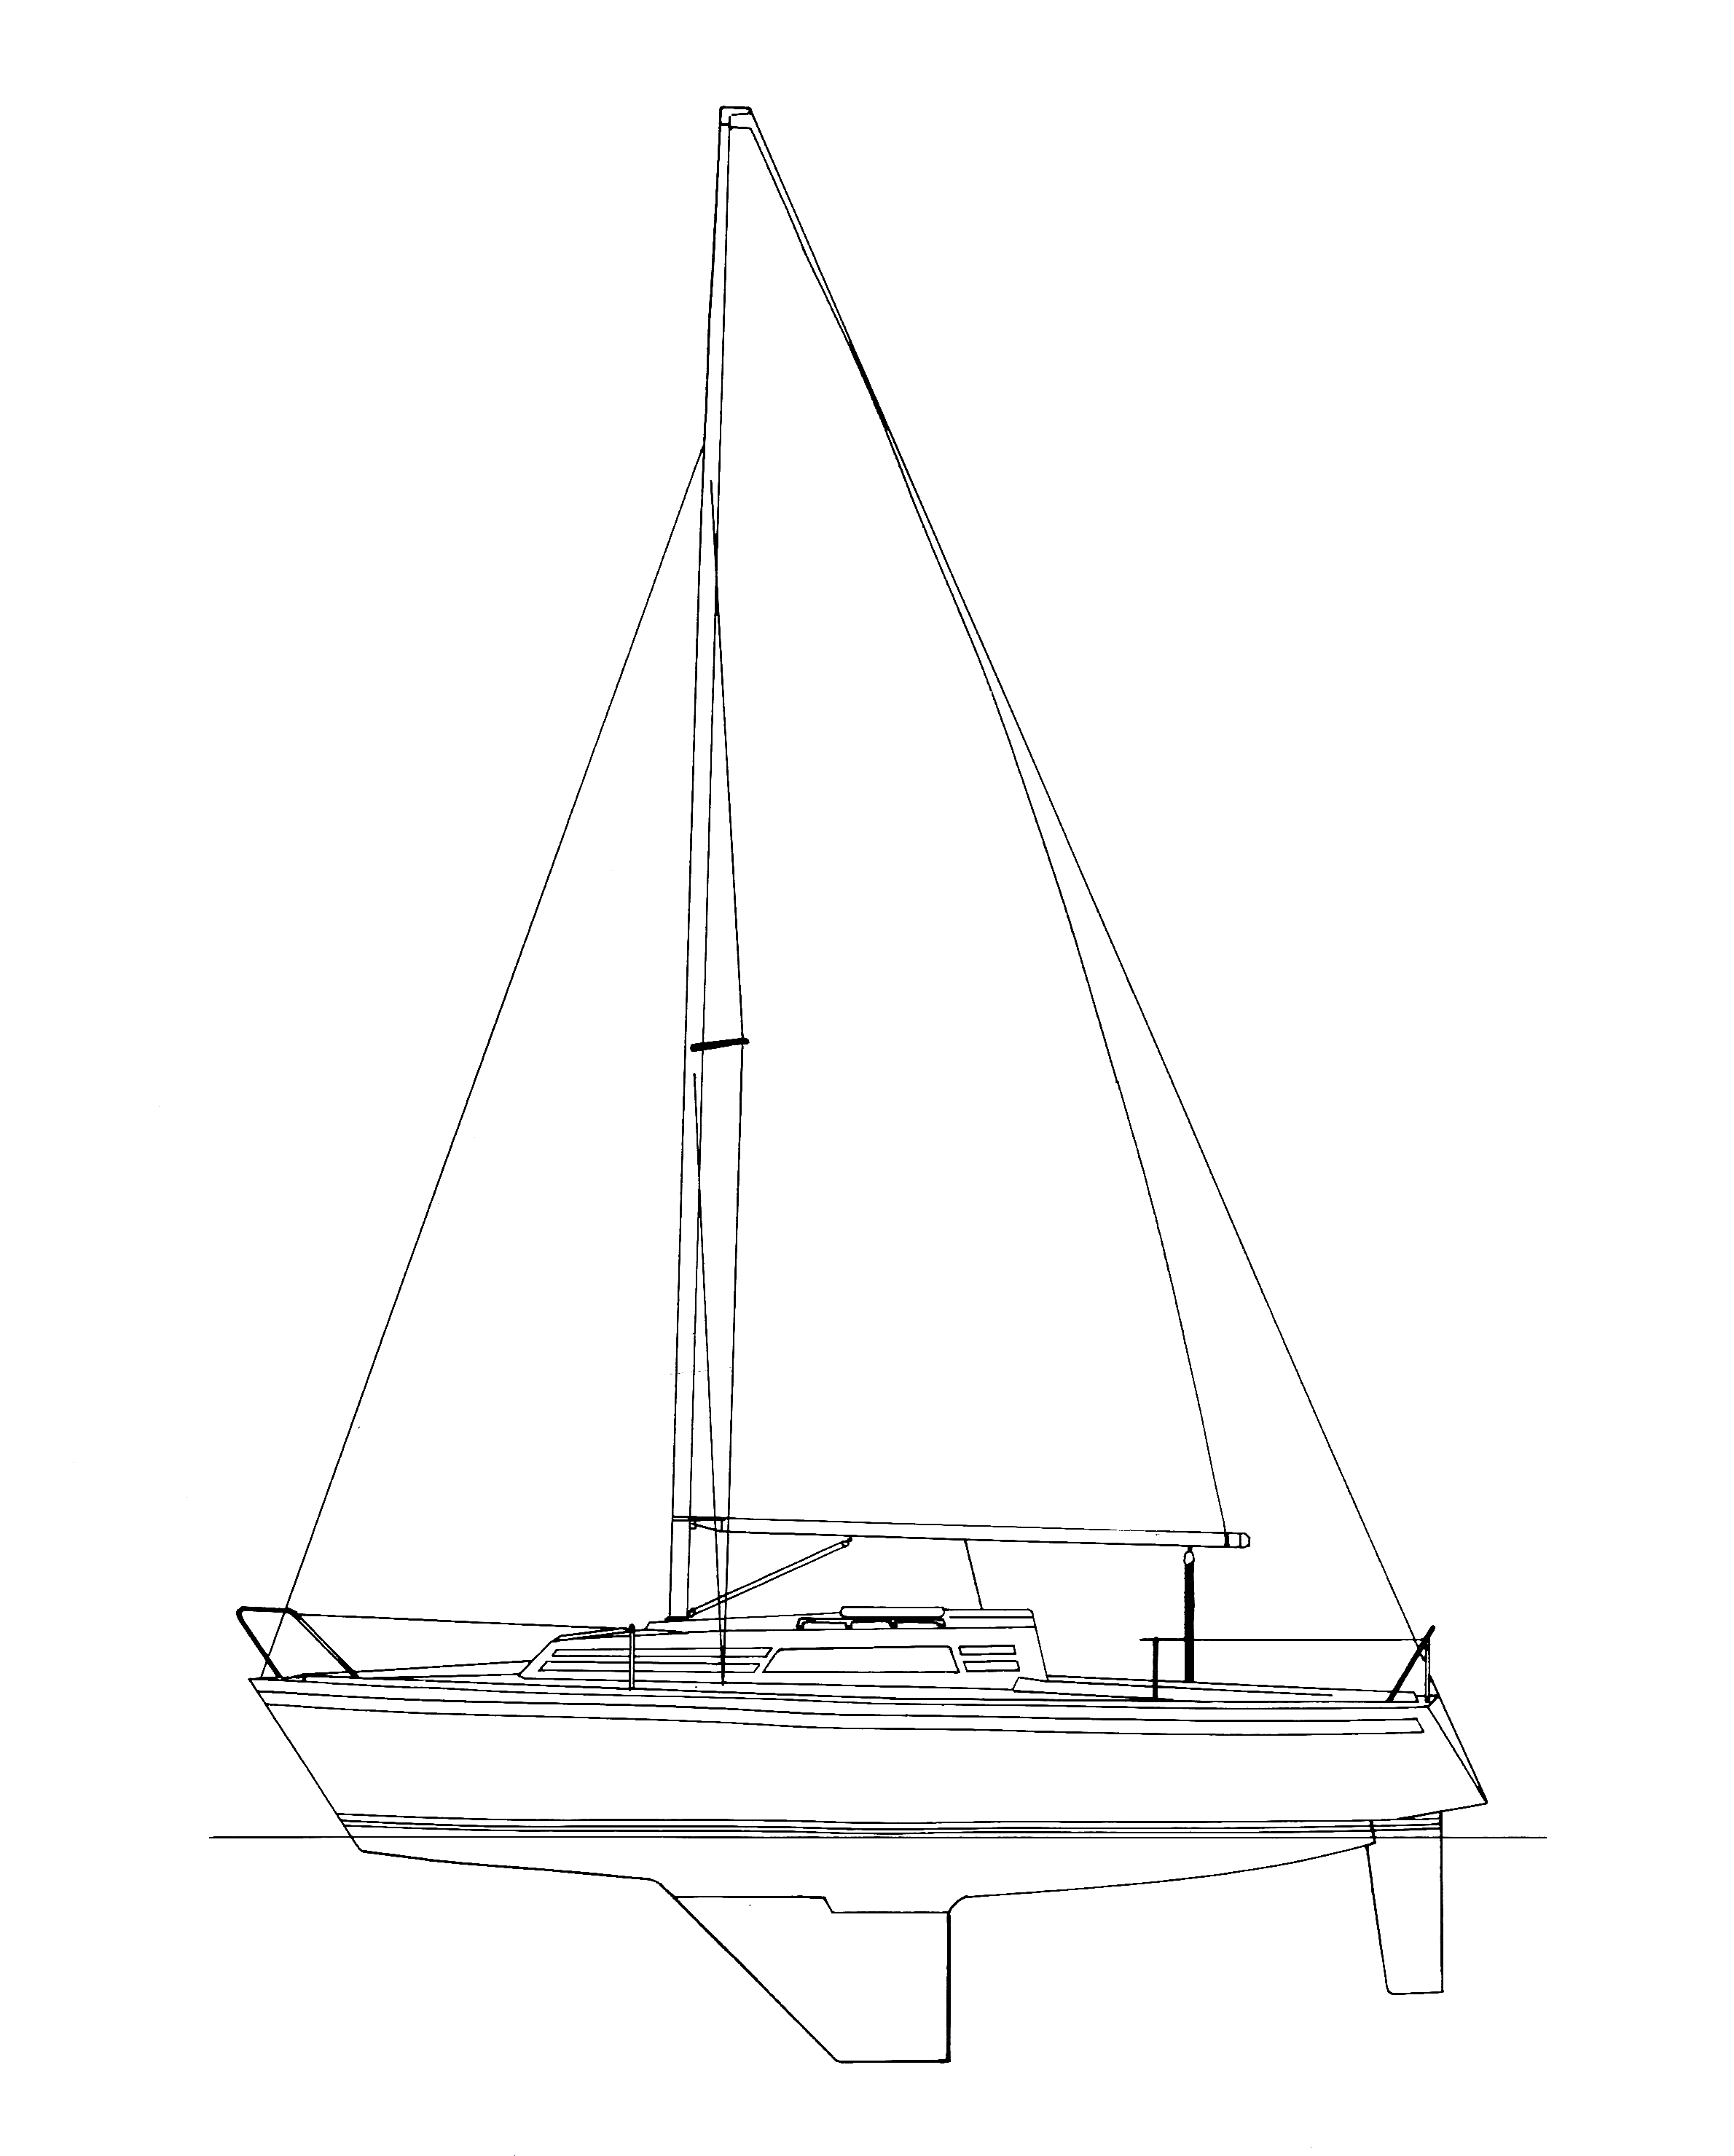
ElecTrip is a 1982 build of Finn Express 8.3m (FE83 - 83 comes from the length of the boat in decimeters, not the build year) which is a sloop, i.e. bermuda rigged single mast sailboat. Full sailboat specifications are available from TRIP's official website. The boat was acquired by the club in 2011 when it was retrofitted with an 8.6 kW Oceanvolt electrical motor and a set of four Torqeedo batteries.
Given that our club's boats are in extensive, almost non-stop use during the entire sailing season, which in Finland normally runs from mid-May to mid-October, significant wear and tear is inevitable - especially when factoring in the variety of use cases ranging from sailing courses, leisure sailing through racing. Cumulative effect of all the mentioned factors was clearly showing, affecting the quality of life and, more importantly, safety. This meant the boat was in (dire) need of a major overhaul.
Following a lengthy discussion within the club, which even involved the possibility of completely replacing the boat, we decided to move forward with the refurbishment project. The total running time of the project was roughly from March 2023 through June 2024 and the project was split in three main phases - replacing the sails, replacing the batteries and refurbishing the interior.
This blog aims to provide a complete overview of the project and its timeline, as well as to serve as an archive of the project and a future reference - or perhaps a cautionary tale of what's ahead for someone daring to pursue a similar endeavor. :-)

Sails
Ordering (March 2023)
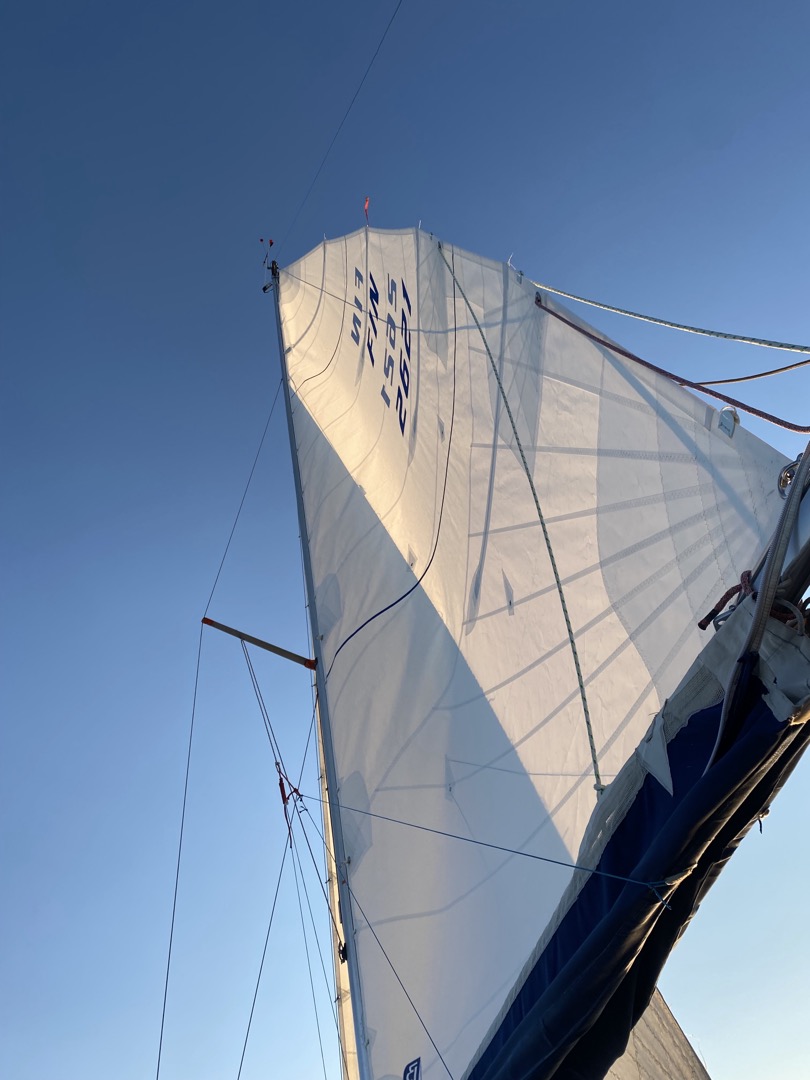
Following a series of consultations and quote inquiries, we moved forward with a sail purchase from WB-Sails. Given extensive wear and our use cases, dacron sails were deemed to be the best choice (as opposed to laminate). We replaced three out of five sails. Main sail as well as Genoa 3 (smaller, 105% jib) were replaced with corresponding radial cut dacron sails from OD-Cruising line, while Genoa 1 (larger, 155% jib) was replaced by a new radial cut sail from High-Tech Cruising line. Storm jib and spinnaker were not replaced, as their condition was still good due to comparably lower use.
Delivery (July 2023)
After several months in the making, we finally received all of the sails and they have been put to good use (or rather, beating) ever since! This meant that we could mark this segment of the project as completed, and even though at the time it seemed like a major step, I was pretty oblivious as to what's ahead of us for the rest of the project.

Preparation for Interior Refit
Workshop Overview
For the interior work, Aalto's Design Factory provided us with access to their workshops. The facilities consist of extensive range of well-equipped workshops and cover a variety of different specializations, such as woodworking, painting, welding, machining, electronics, etc.
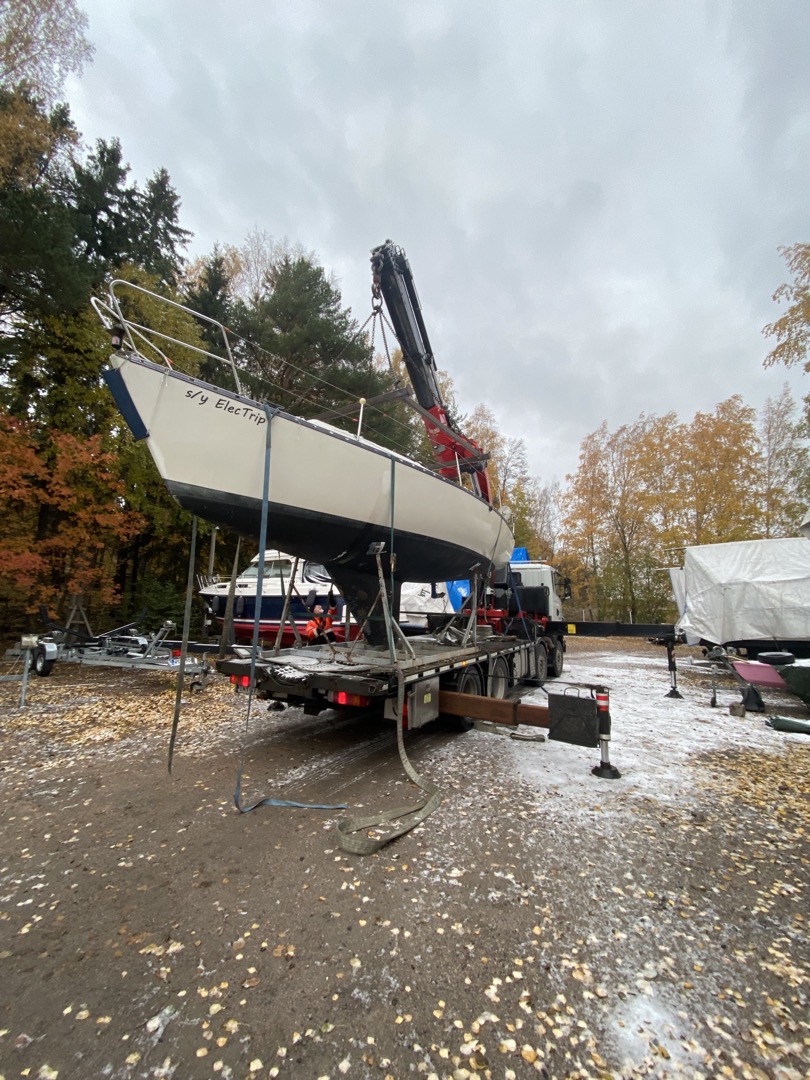
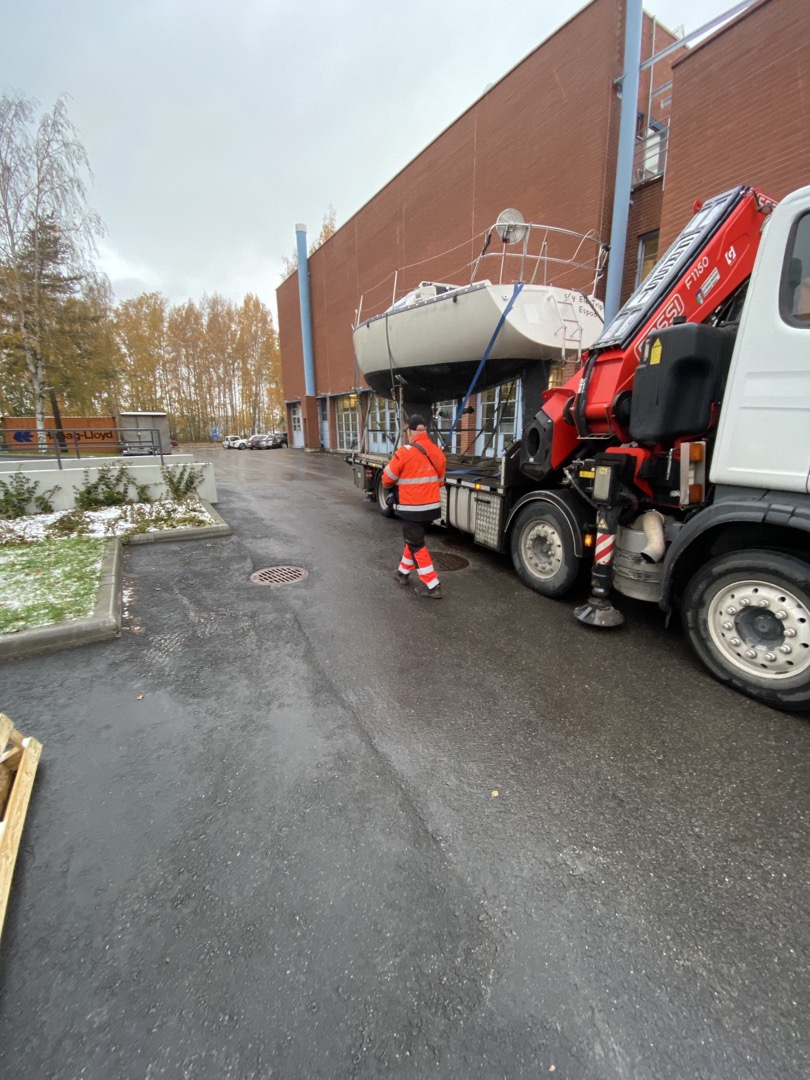
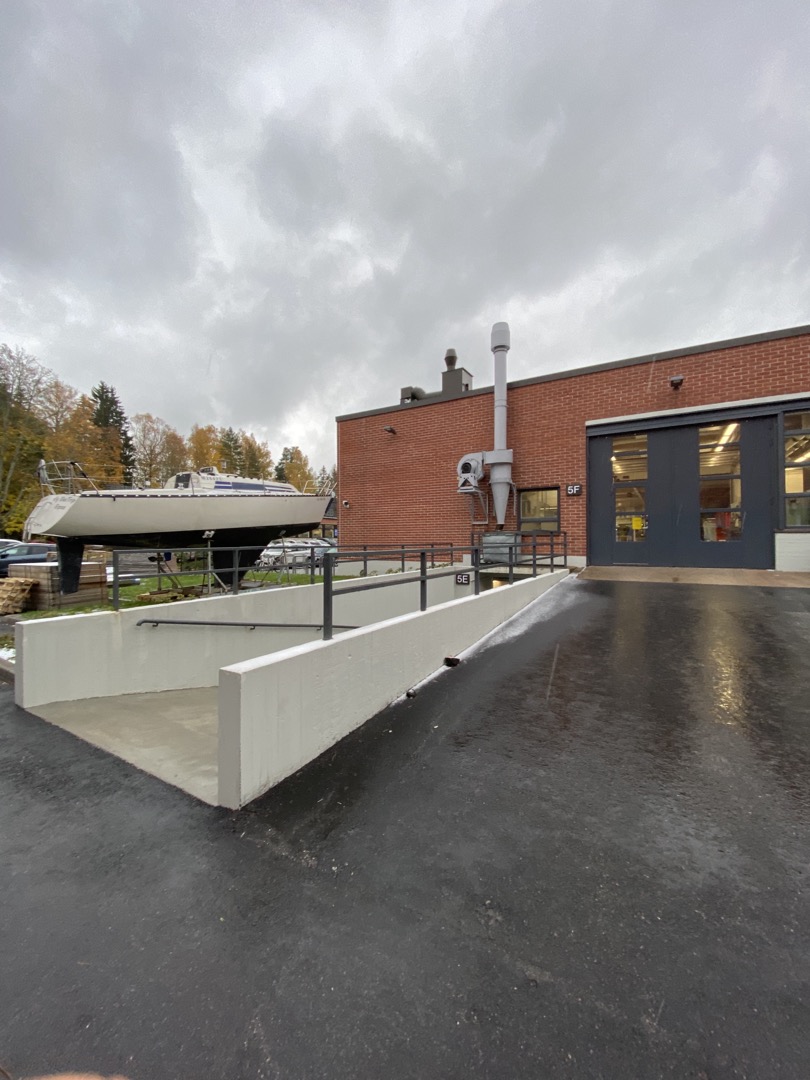
Relocating the Boat (October 2023)
The sailing season (here in Finland) normally runs till mid-October. With its conclusion, in agreement with Aalto's Design Factory, we relocated the boat to a designated spot in their backyard. Relocation was relatively challenging as it required routing the hoisting truck with the boat through the Aalto's student campus in Otaniemi. Despite the challenge, in coordiation with the Kuljetus Karttunen hoisting company we managed to move the boat successfully and without any complications. Admittedly, taking the boat on the back of a truck through the whole Otaniemi (Aalto's campus) was quite cool!
Batteries
Ordering (May 2023)
We started the battery replacement by assessing the battery market and requesting a range of quotas from the manufacturers. As the boat was previously equipped with four Torqeedo batteries, the easiest solution would have been just to order the exact same model. However, these batteries turned out to be quite lacking compared to the newer models available on the market, especially in terms of weight to capacity ration due to somewhat outdated cell chemistry (lithium vs. newer LiFePO4). They were also not officially supported by Oceanvolt's BMS anymore. After some consideration and several quotes, we moved forward with MG Energy LFP 230 battery packs.
Placement (May 2023)
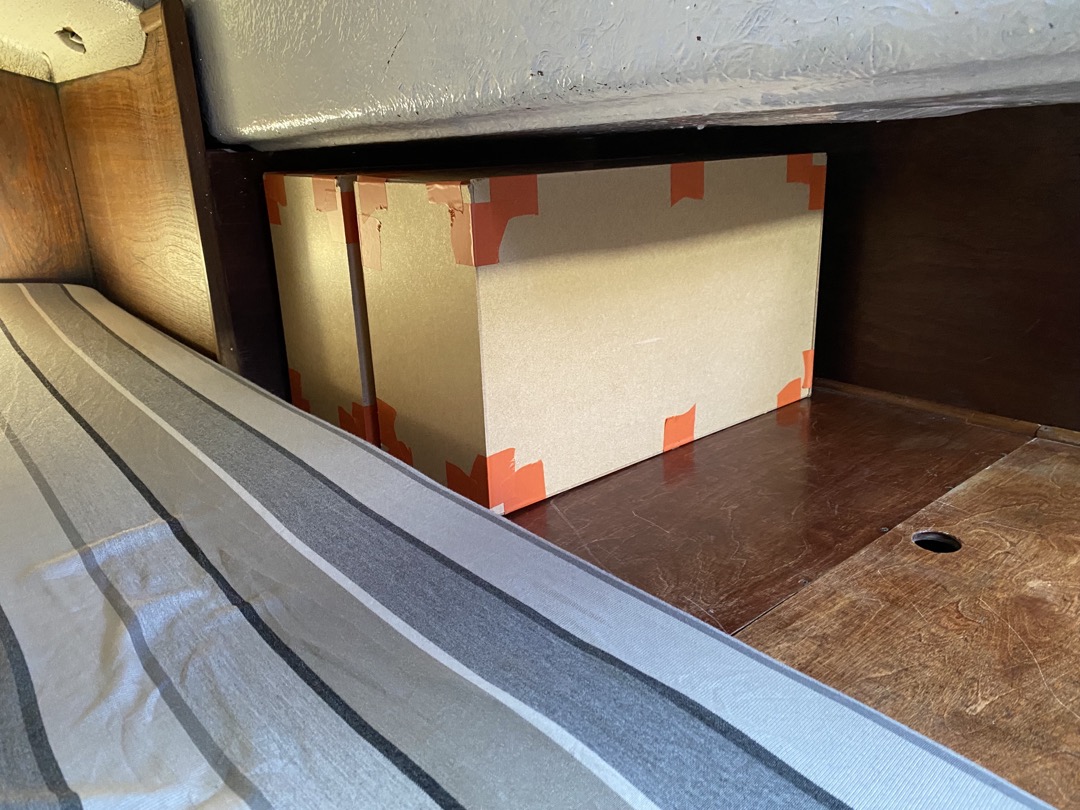
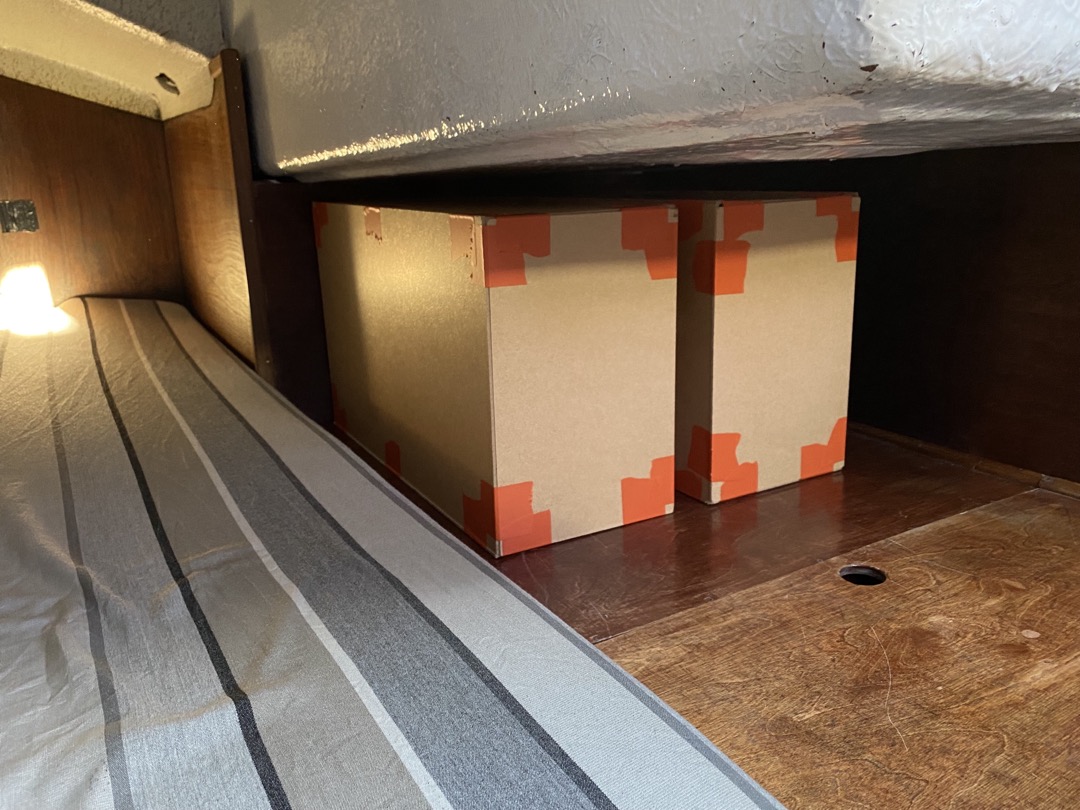
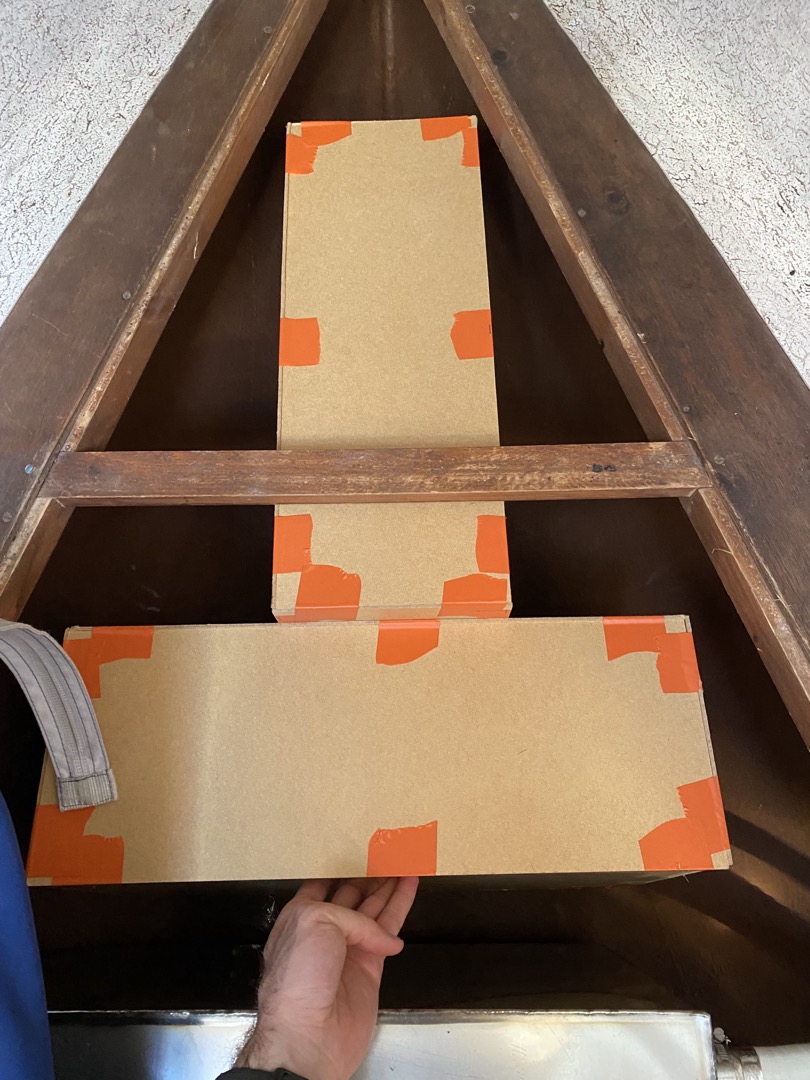
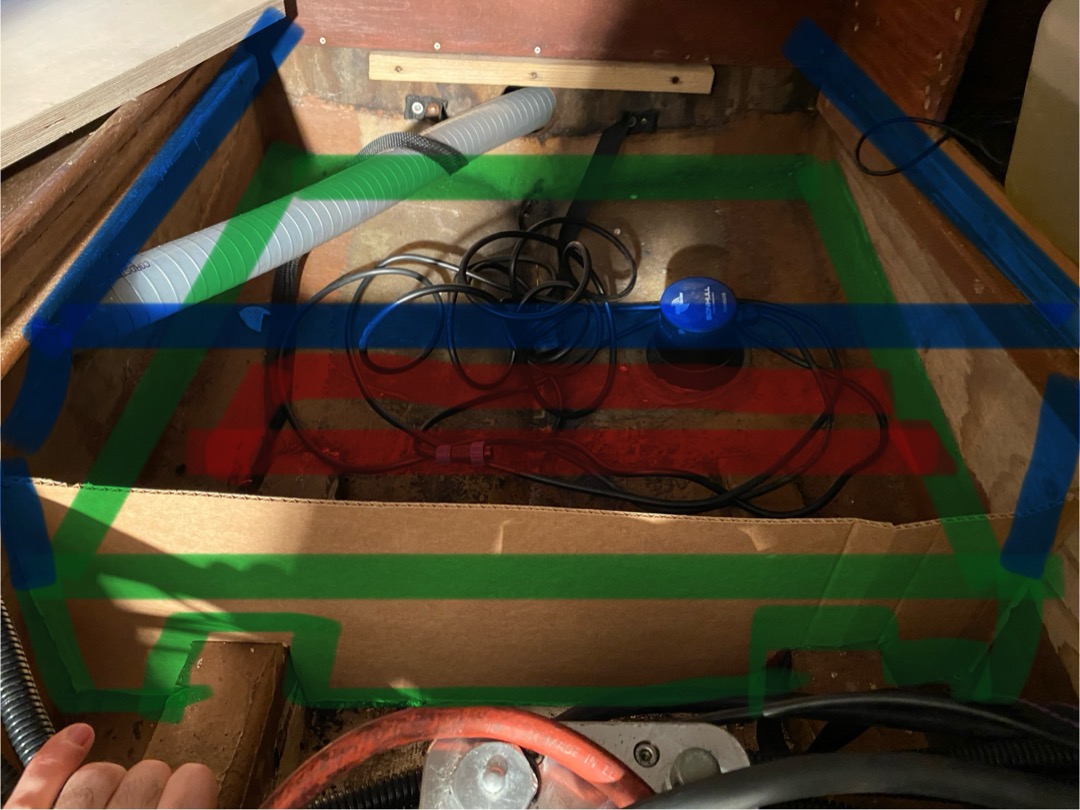
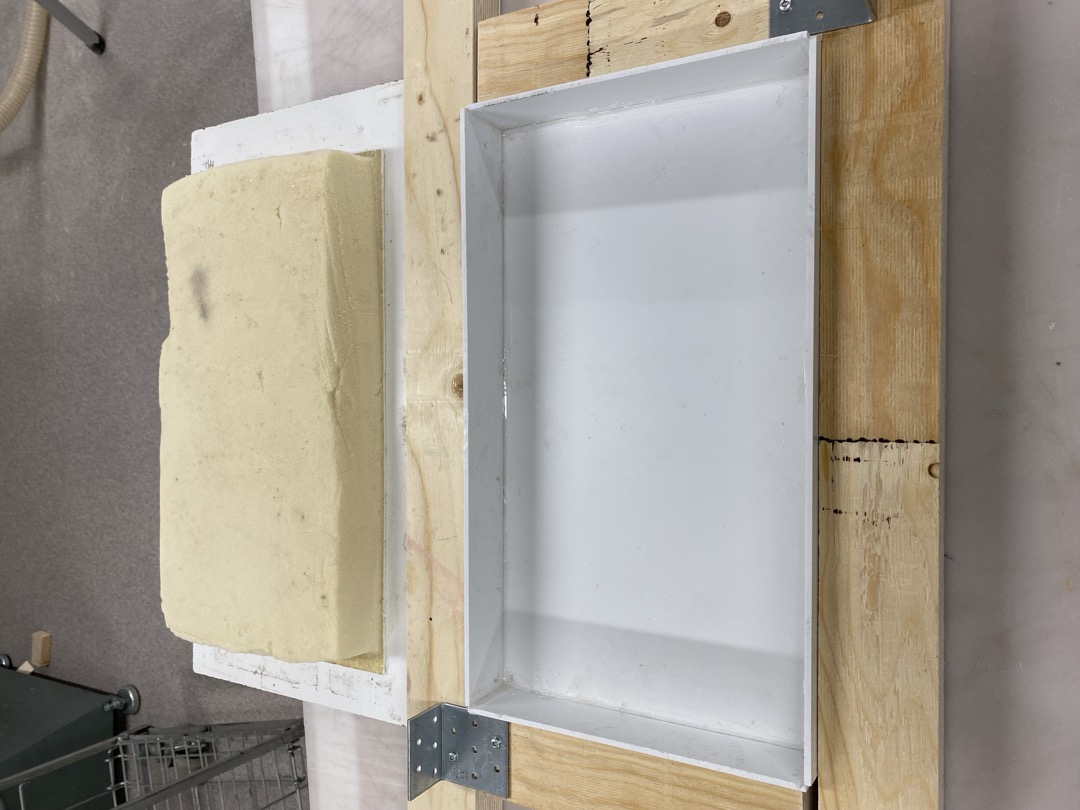
Due to improved chemistry characteristics, two MG packs had the same capacity as four old Torqeedo ones. Although this meant better space efficiency, the new battery packs were narrower and taller and it required us to figure out a new placement - the old placement was not possible as it would require raising the benches making the port side bench useless for sleeping as legroom was already constrained from the top.
We created mockups with the same dimensions and tested a variety of placements. Front of the boat offered plenty of space (right photo), but the forces during sailing can be quite strong and we decided against that option. Instead, we decided to place batteries in the back, on top of the old engine mounts and in configuration along the boat lenght (top left photo) as it offered some additional support.
P.S. later on Oceanvolt was kind enough to provide us 1:1 battery dummy so we didn't have to play with these makeshift dummies when doing real measurements. :-)
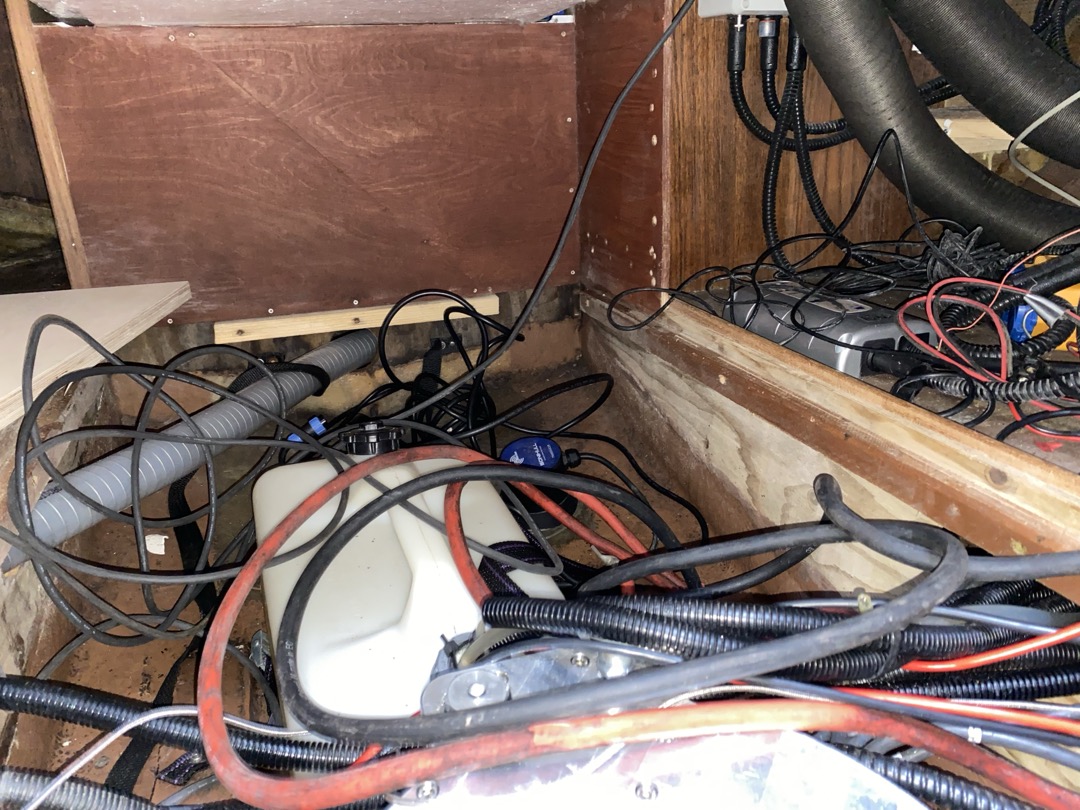
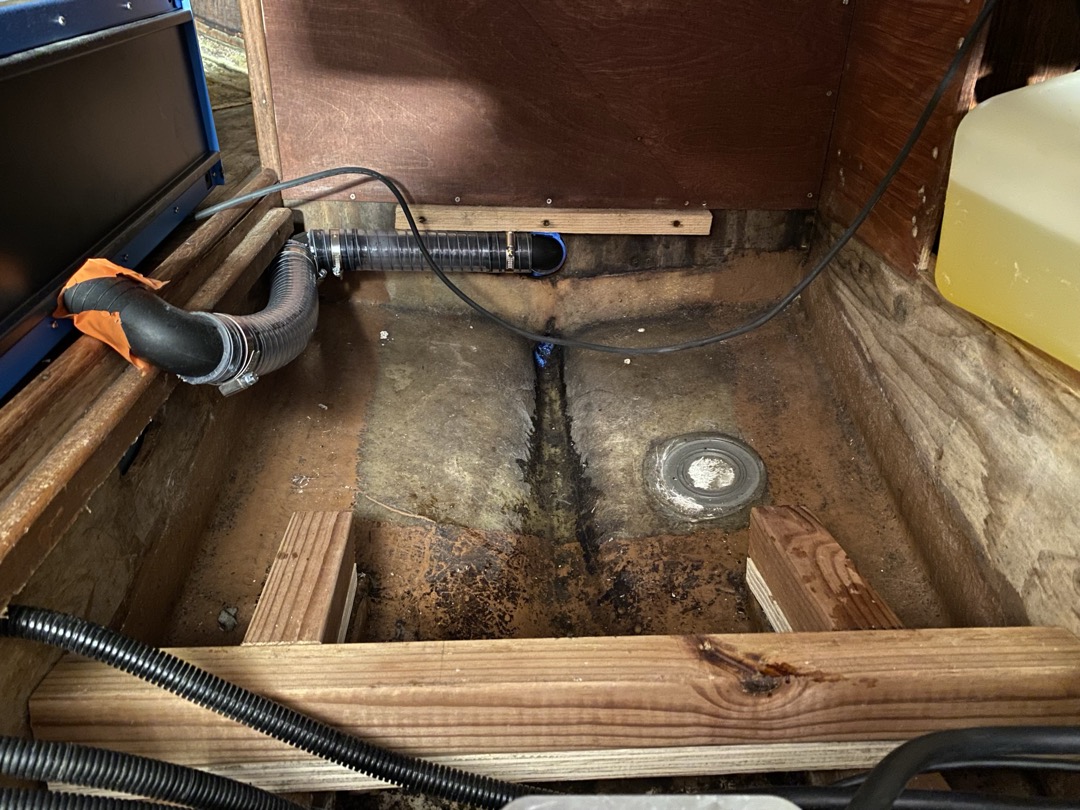
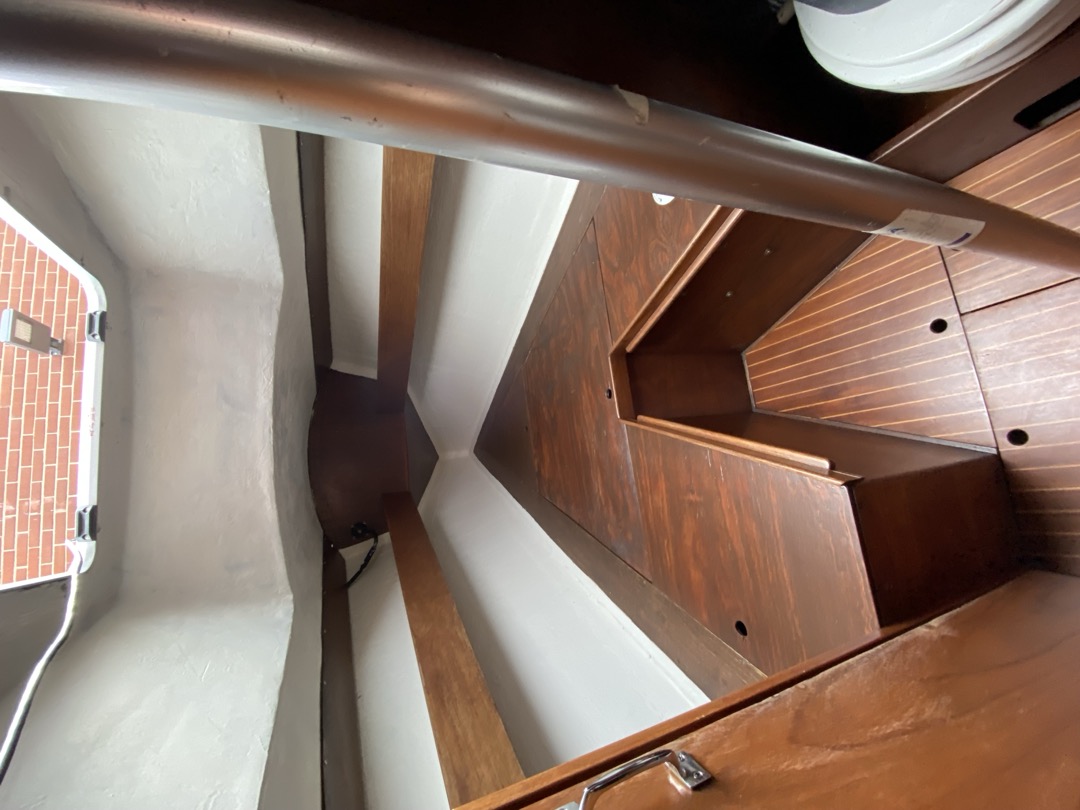
Repurposing Engine Compartment (March 2024)
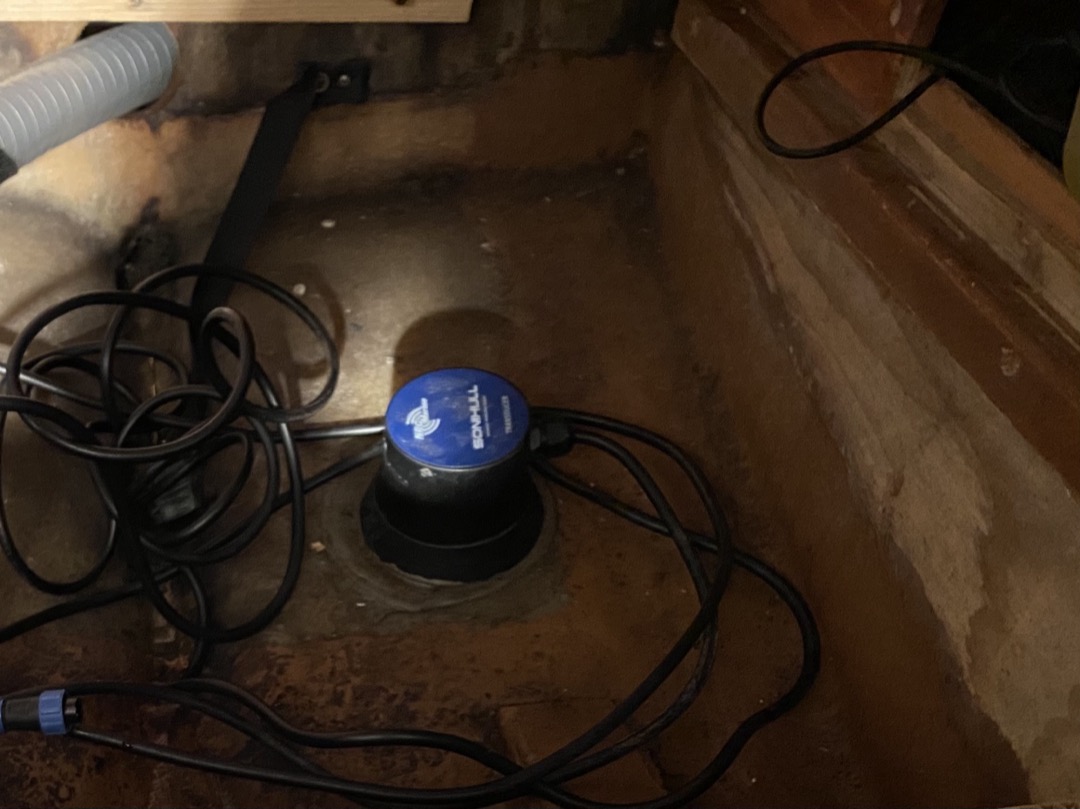
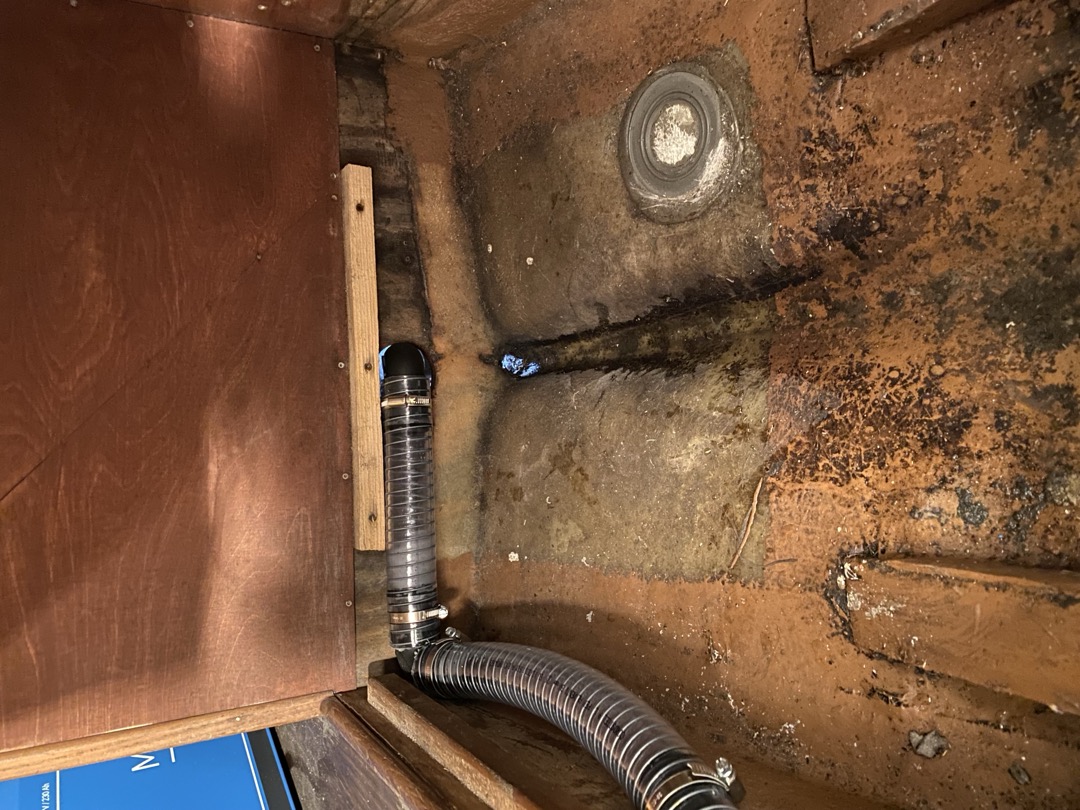
In order to install the batteries in the desired area behind the electric engine, we needed to repurpose the old engine compartment. This involved doing away with Sonihull (ultrasonic anti-fouling solution, that unfortunately never seemed to work for us), re-routing the water piping to fit the battery supports and batteries themselves as well as relocating the diesel tank (used for stove and heating). Removing Sonihull was quite a hassle as it was firmly glued to the hull. We resorted to using a chizzle and hammer along with some force, which did the trick in removing it. The original water piping was rerouted to make space for battery support and batteries.
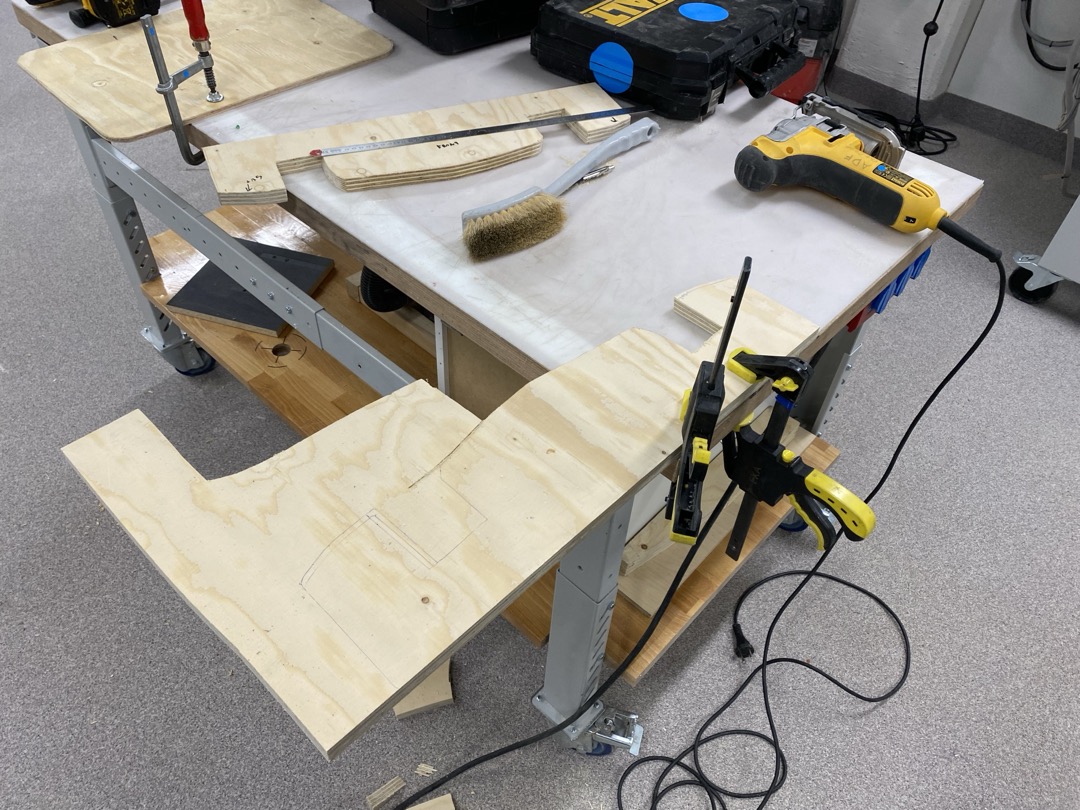
Slot Prototyping and Build (March - April 2024)
Creating battery slots ended up posing a bigger challenge than initially anticipated. This is also the part where we got reminded about the "measure twice, cut once" saying through our own failure. :')
The first iteration of supports was imagined as a vertical wooden piece that would wrap around and sit on top of the engine mounts and the hull (see sketch photo and rightmost photo for attempted execution). In the end, we discarded this solution as it ended up being unnecessarily complicated, especially as the wooden support had to sit tightly against the hull and making the wooden support correctly resemble curvature of the hull (which also had a lot of imperfections) was too difficult.
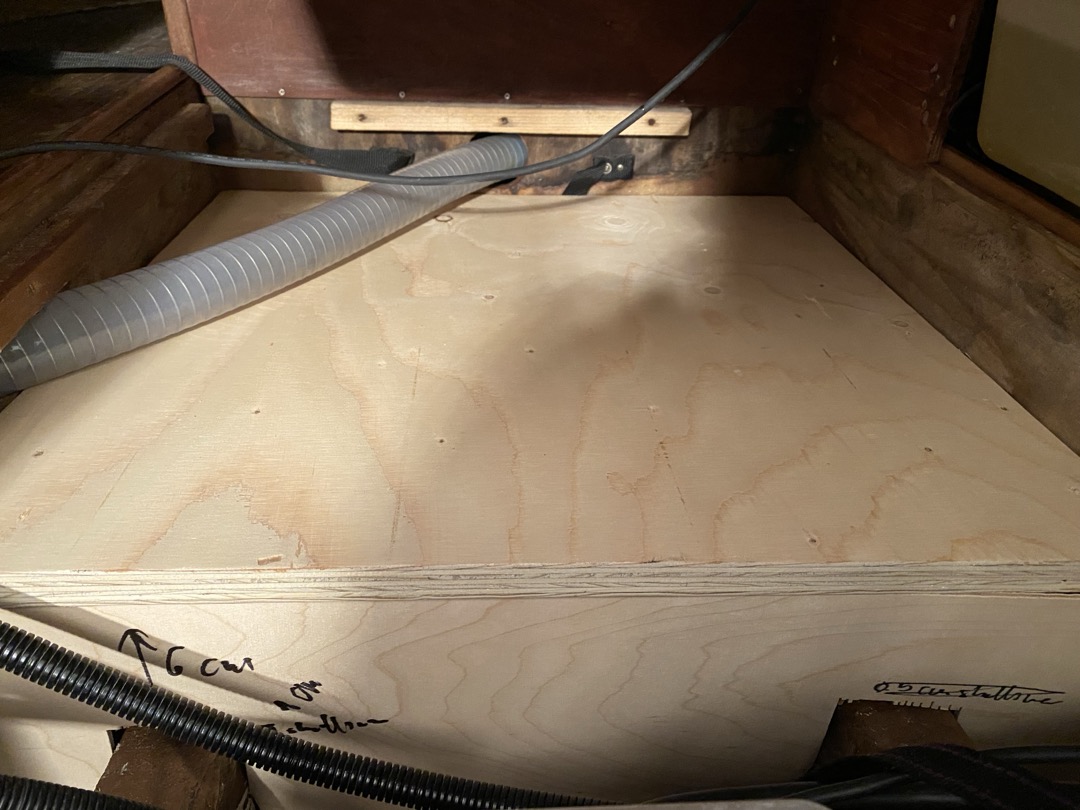
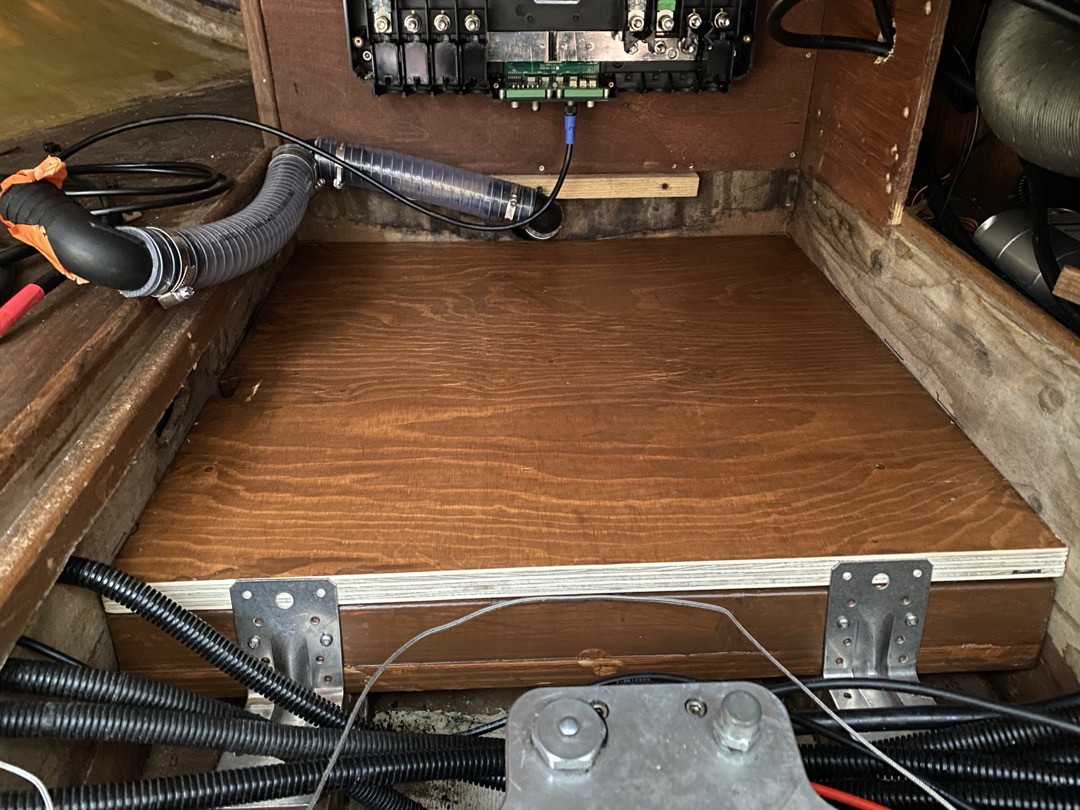
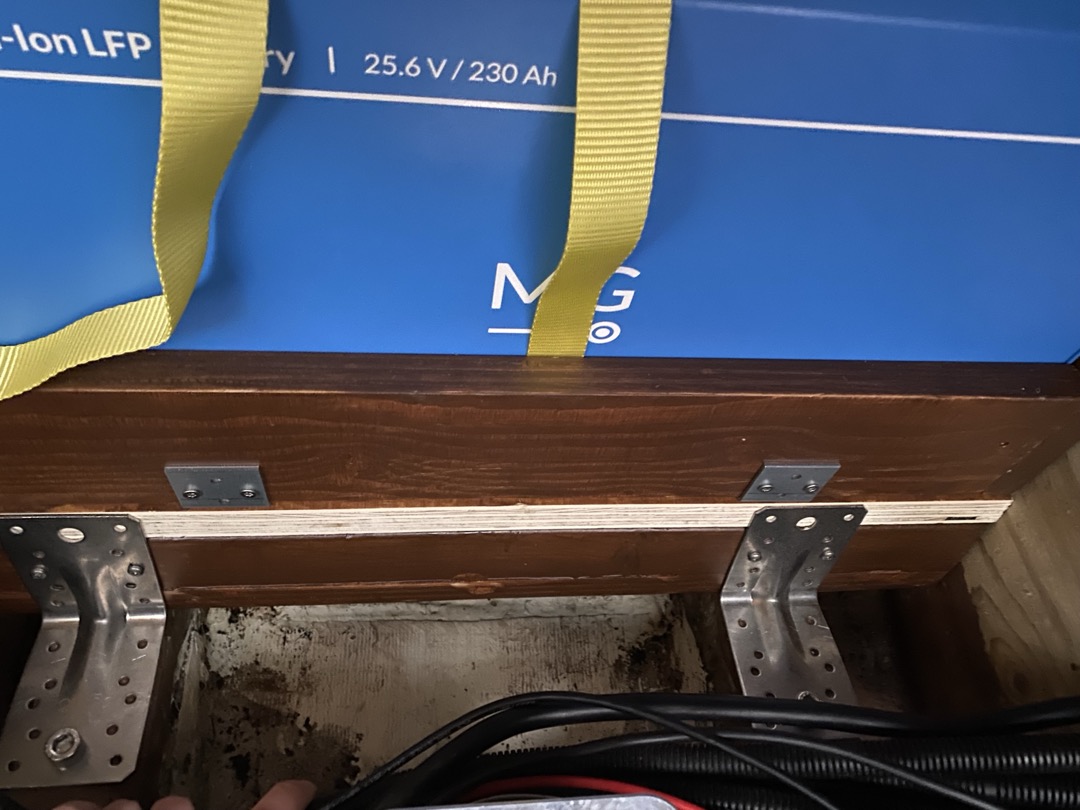
After abandoning the first prototype, we proceeded with figuring out the next, simpler iteration. Instead of creating a vertical piece that hugs the engine mounts, we decided to put a horizontal beam sitting across and on top of old engine mounts. This beam, along with the rear corners of the hull, would then hold the horizontal panel on top of which the batteries sit. This is the part where the design mistake happened, as I failed to realise that the old engine mounts are not level, but are instead tilted backwards at -10 degrees (see second column below, top photo). This, in turn, caused the wooden beam to not support the panel fully, as the contact area between the panel and the beam would only be the front edge of the panel and the beam. Had we left this, it would pose a serious problem once the batteries were in place as the support panel would potentially sag (or even crack) under batteries' weight.


In order to fix this issue, we added wedges to keep the panel level when it sits in place (see middle column above and first column below). Additionally, we shaved off the edge of the panel at 10 degrees as well, so that the brackets sit flat against the edge of the panel (see second column below, lower photo).
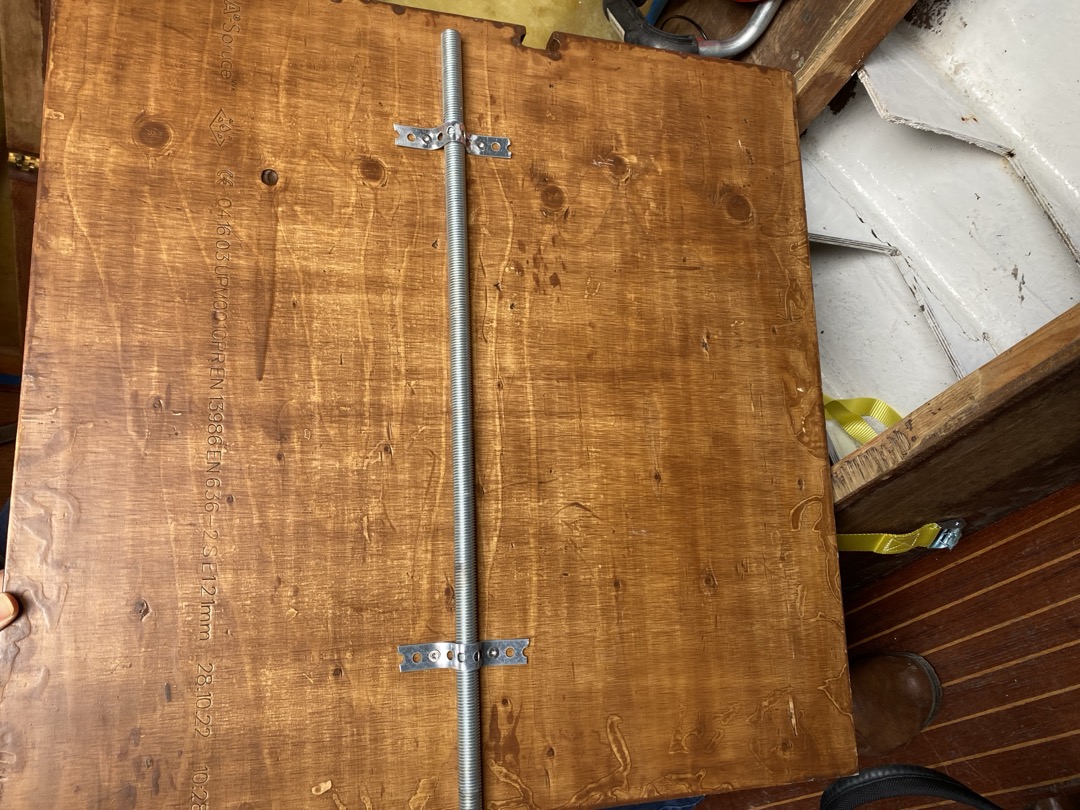
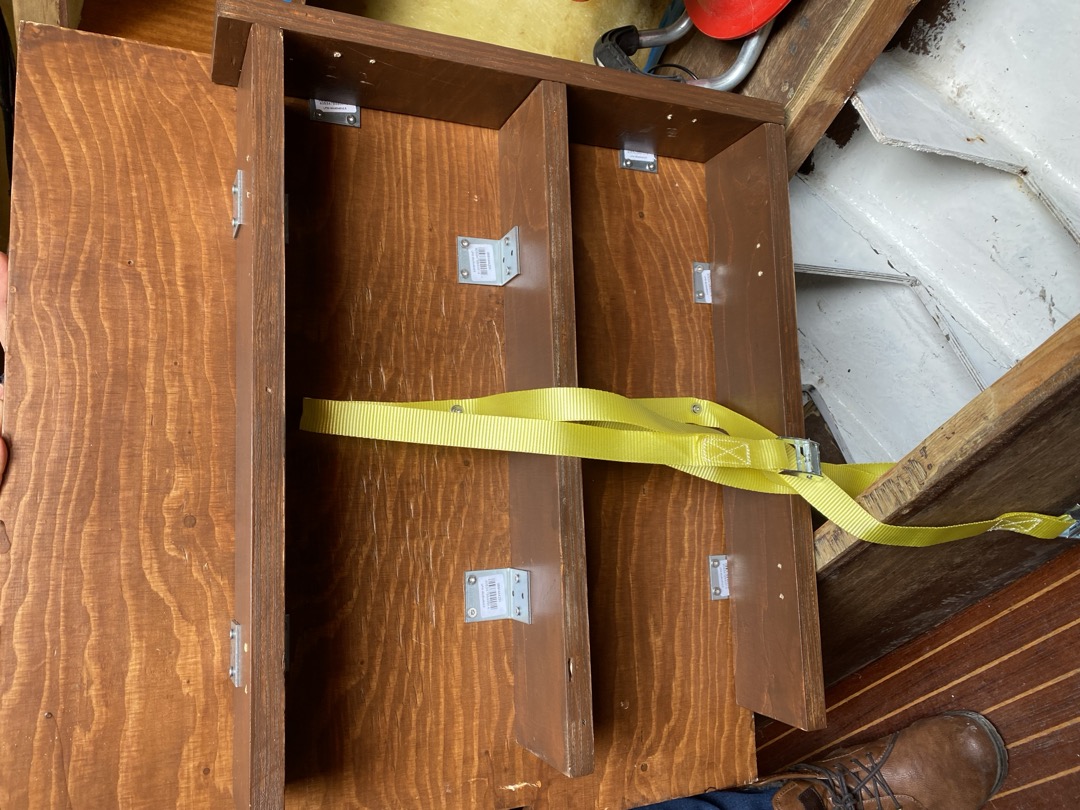
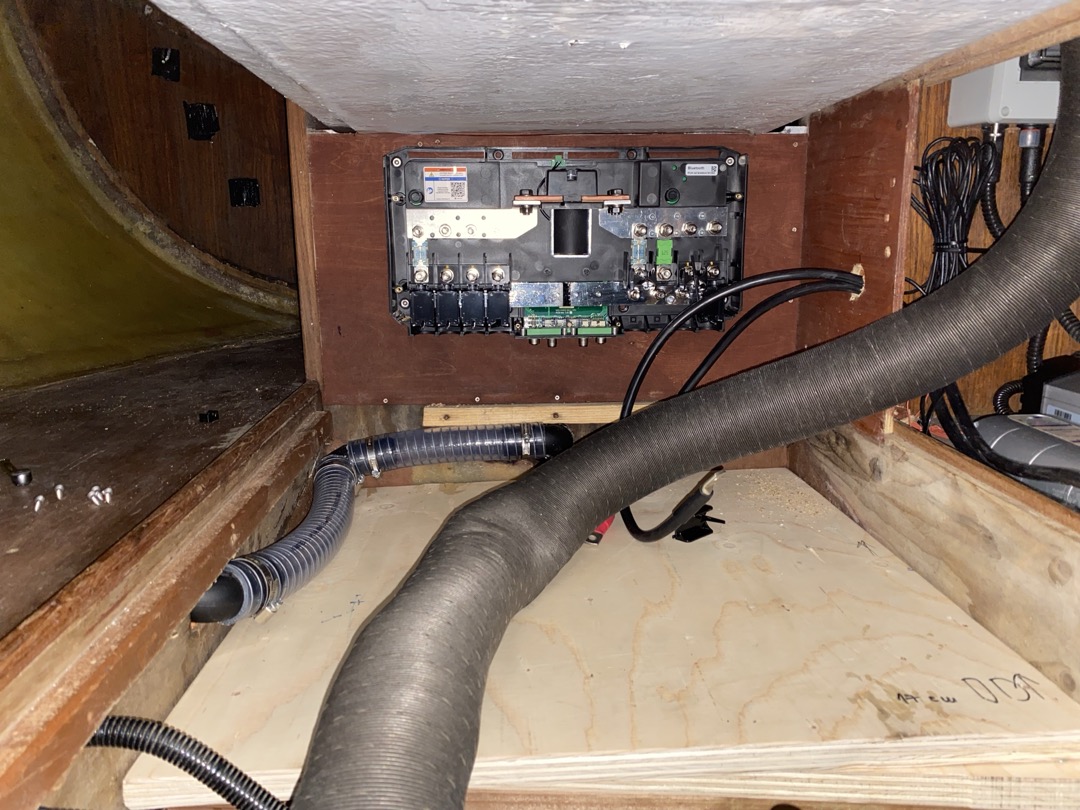
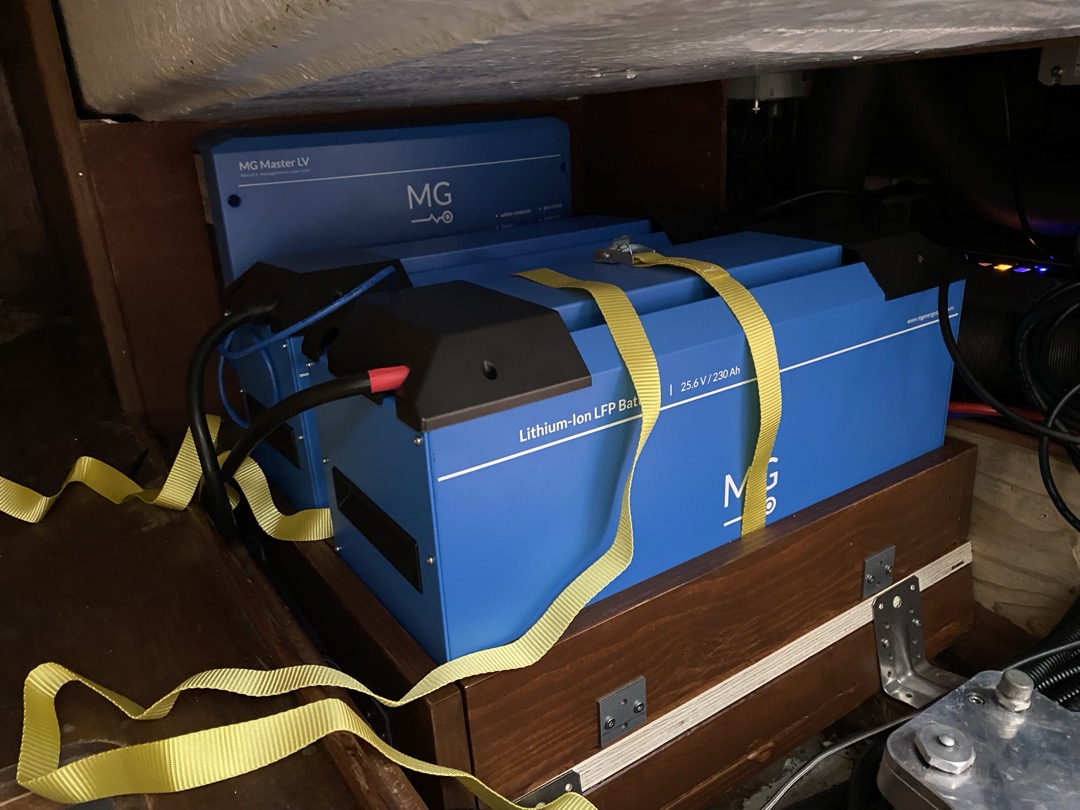
Finally, we fitted the wooden battery supports on top of the old, fiberglass engine supports. The wooden supports were additionally reinforced with brackets (they are all A4 316 marine grade stainless steel, since the water flows freely from the outside compartment to the lowest point of the boat in the bilge below). The panel was then installed on top and drilled into the slots below. The panel holds the frames for the batteries and is reinforced with a steel rod on the other side to better distribute the weight of the rear battery. In order to ensure that batteries stay firmly in their slots and prevent vertical motion, we added additional straps at the bottom of each slot.
Installation (April 2024)
Once the battery slots were ready and in place, we coordinated with Oceanvolt's technician to have the batteries installed. Getting batteries into place was a huge hassle since the space is incredibly tight, and each of them weighs 40 kg. We installed the first (back) battery by sliding it into the slot from the sb side bench - this approach was a mistake as the battery kept getting stuck on the brackets that hold the frames, and it was really difficult to lift it over the brackets. We had to resort to using a crowbar and a hook that was pulled from laivaputka through the compartment where heater sits. The second battery went much more easily - we put it on its side on an additional wooden panel that we had at hand. We then brought it close to the slot, aligned and tilted it so that the battery just slid into place.
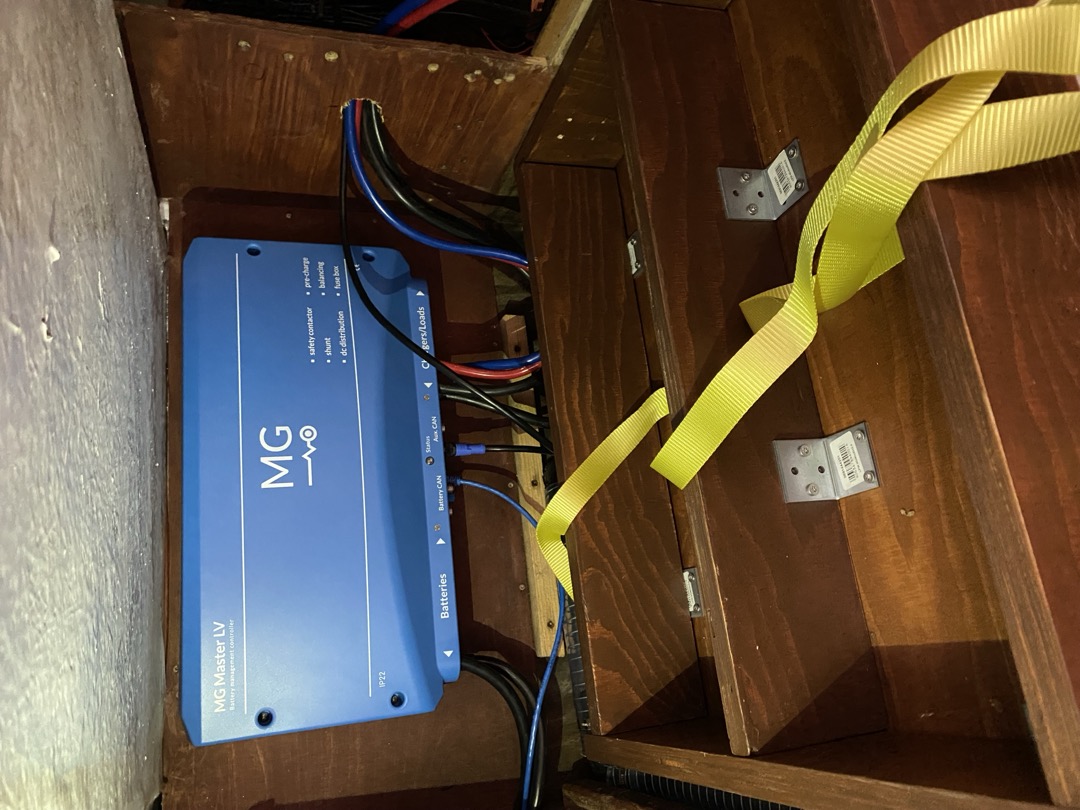
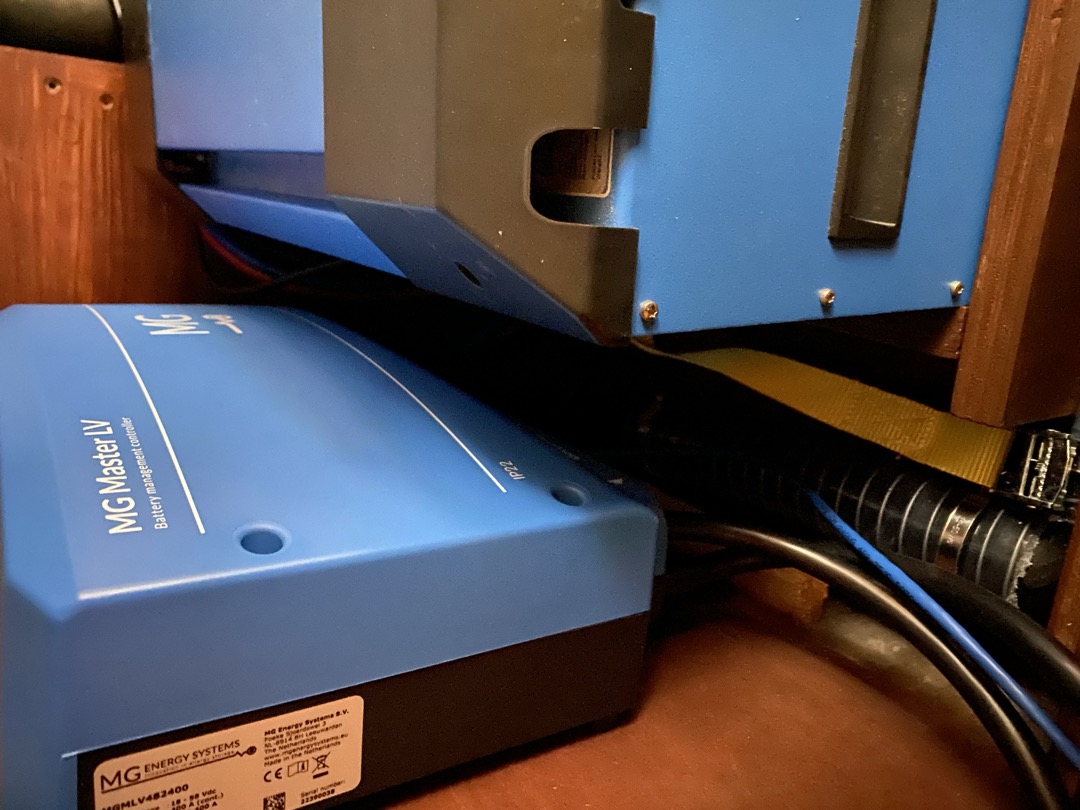
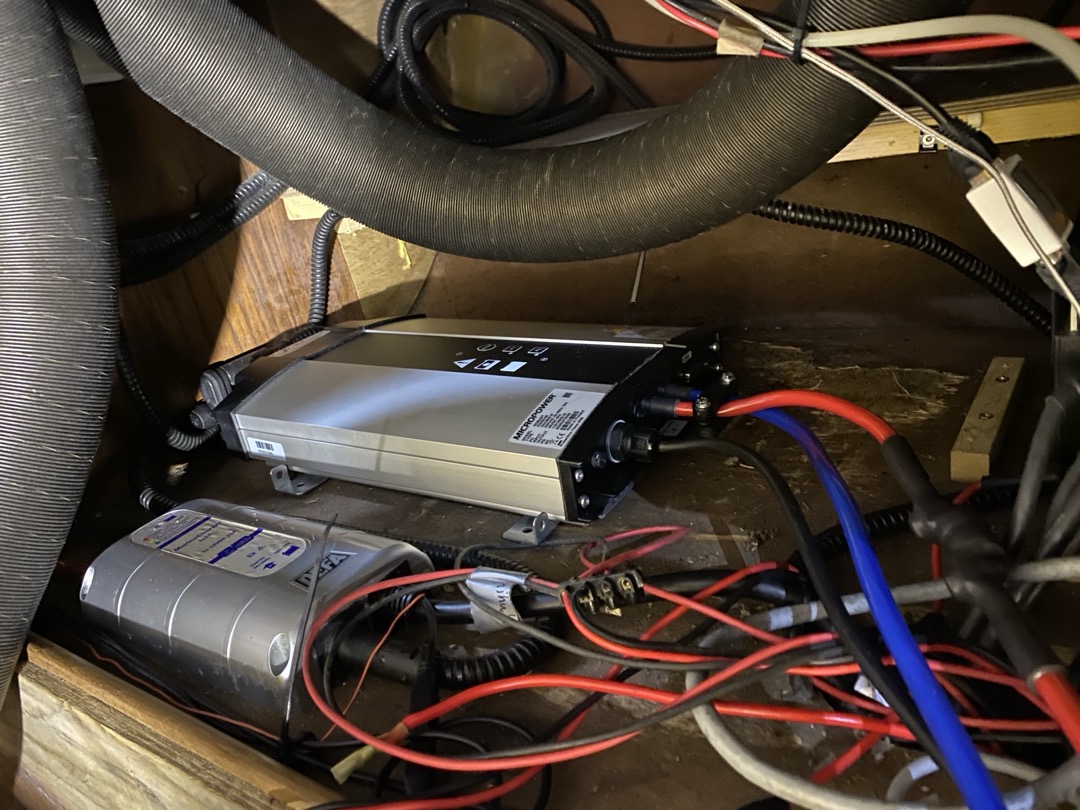
The two batteries are sitting on the panel with BMS (battery management system) mounted behind them on the back wall. The charger is located on the port side, in the side compartment together with the heater and leisure battery charger. Additionally, the fresh water pipe is now running very closely between the battery frames and the bench. NB diesel tank (for the stove and heater) has also been relocated, it now sits on port side, roughly under the stove.
List of installed components:
- 2x MG LFP 230 Battery Modules
- MG Master LV BMS (Battery Management System)
- Micropower Robust 3000 Charger
Covers (May 2024)
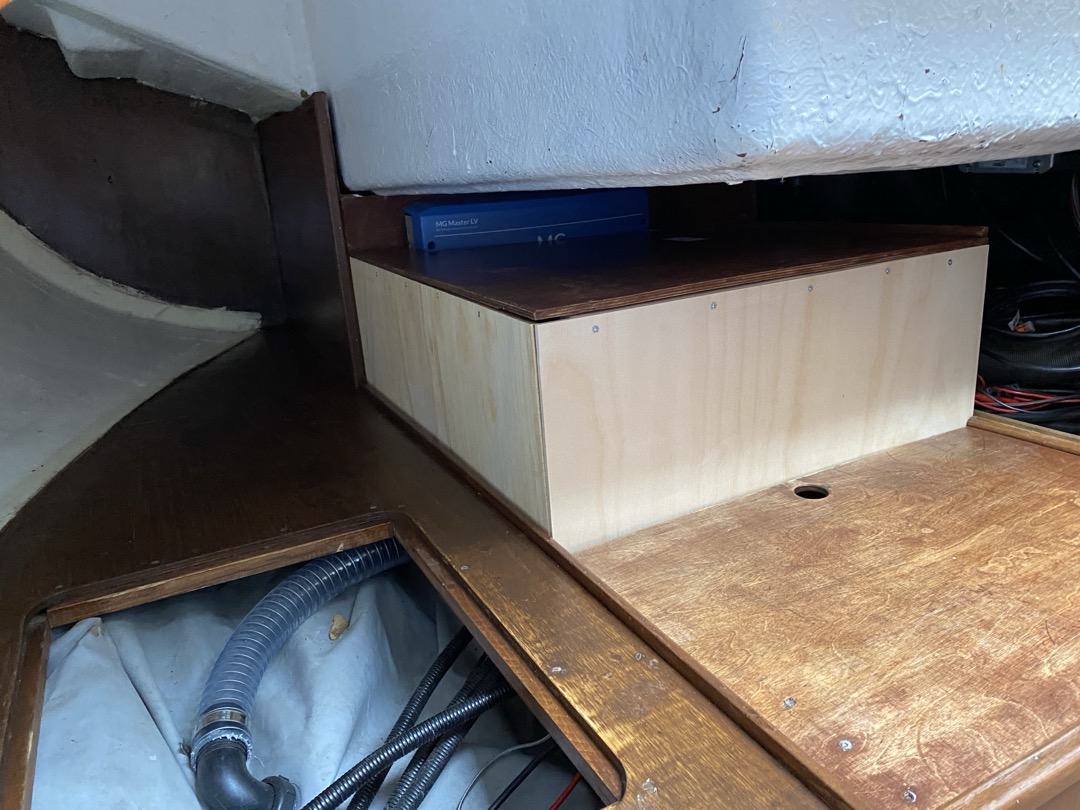
The change of configuration in the engine compartment also required us to redesign the battery cover. We did this by repurposing the old top cover and cutting it out accomodate BMS. We then added vertical wood panes to account for the height of the batteries. In order to ensure proper cooling, we left an open space between the batteries and port side compartment where other components are located. We also added cooling holes on the starboard side of the cover. The top of the compartment can be used as storage for charts, logbooks, etc.
Interior
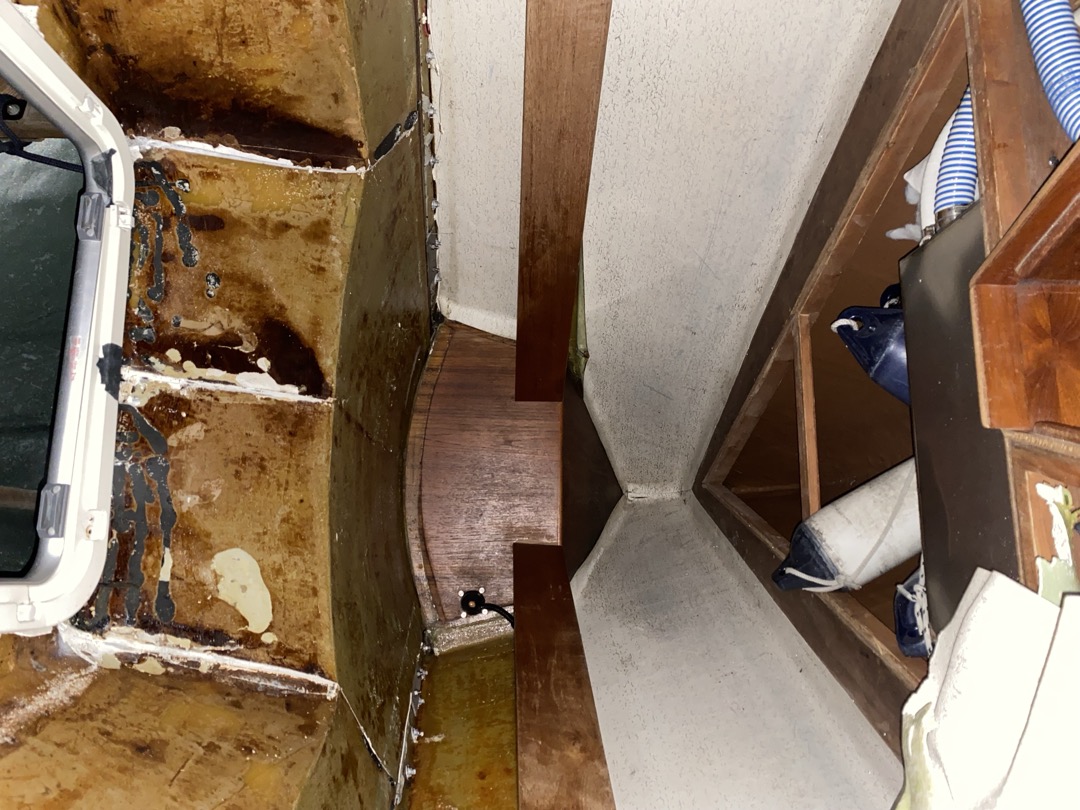
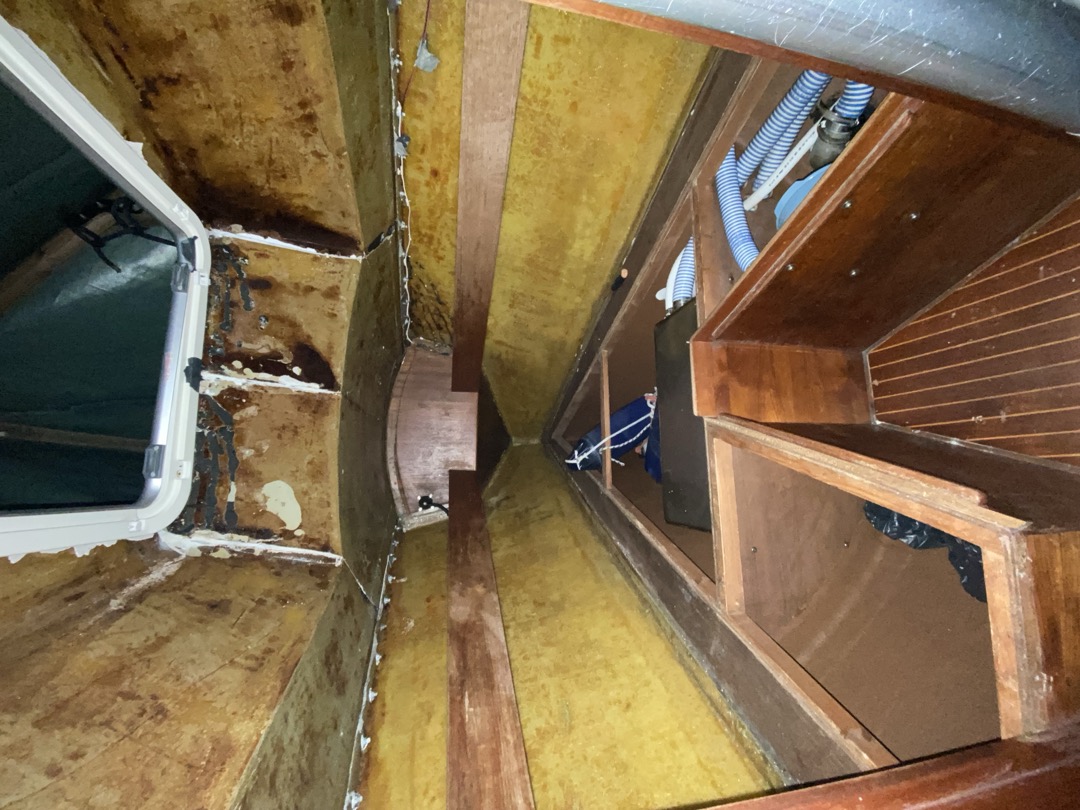
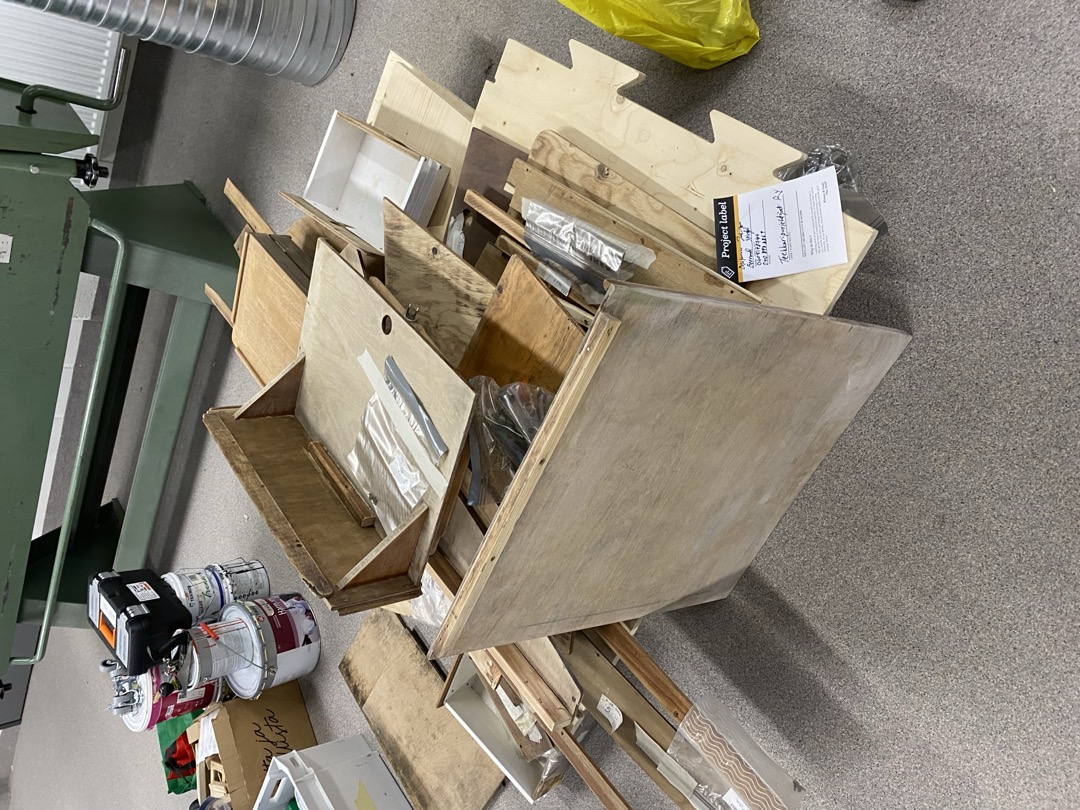
Interior Stripping and Labelling (November - December 2023)
During November we started with the first more serious interior alterations - ones that could be described as a point of no return. This involved getting rid of all the clutter in the boat and removing all of the detachable components of the interior in preparation of their refurbishment. We also started stripping the old vinyl upholstery that was full of mould and was falling off the ceilings. For this we used paint scraper and heatgun to weaken the glue. Ultimately, the goal was to replace the upholstery with something more forgiving and easily maintainable - as you will see later, this turned out to be polyester topcoat.
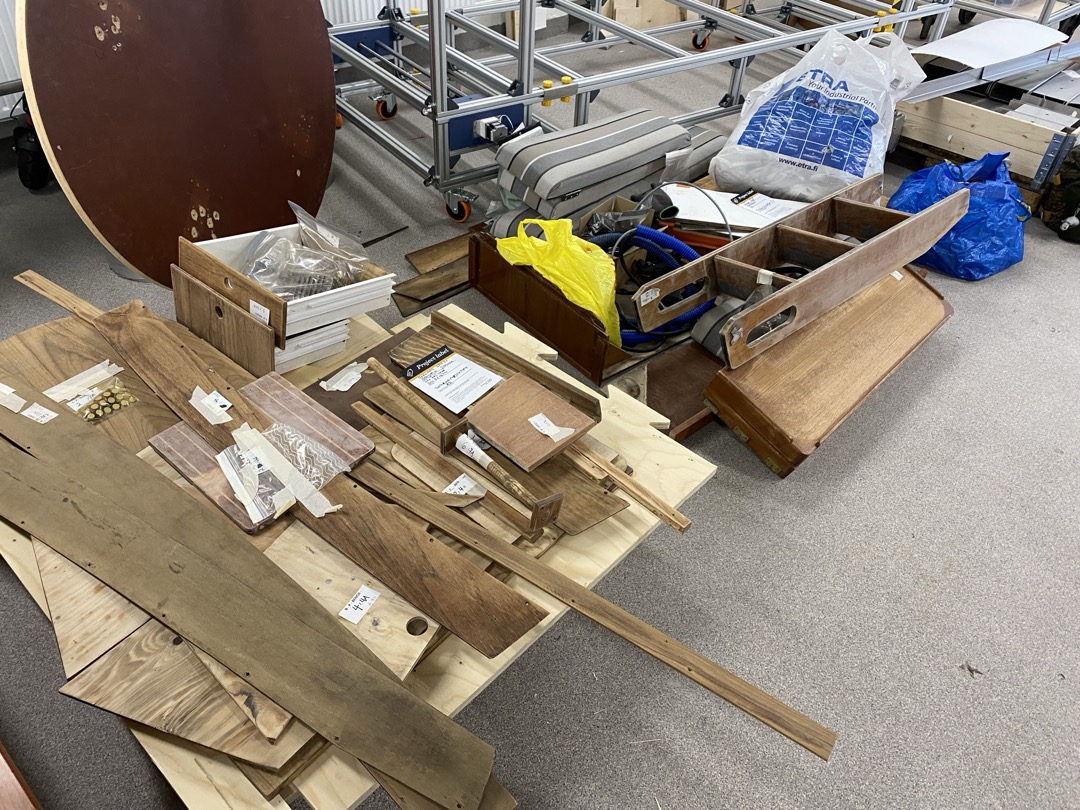
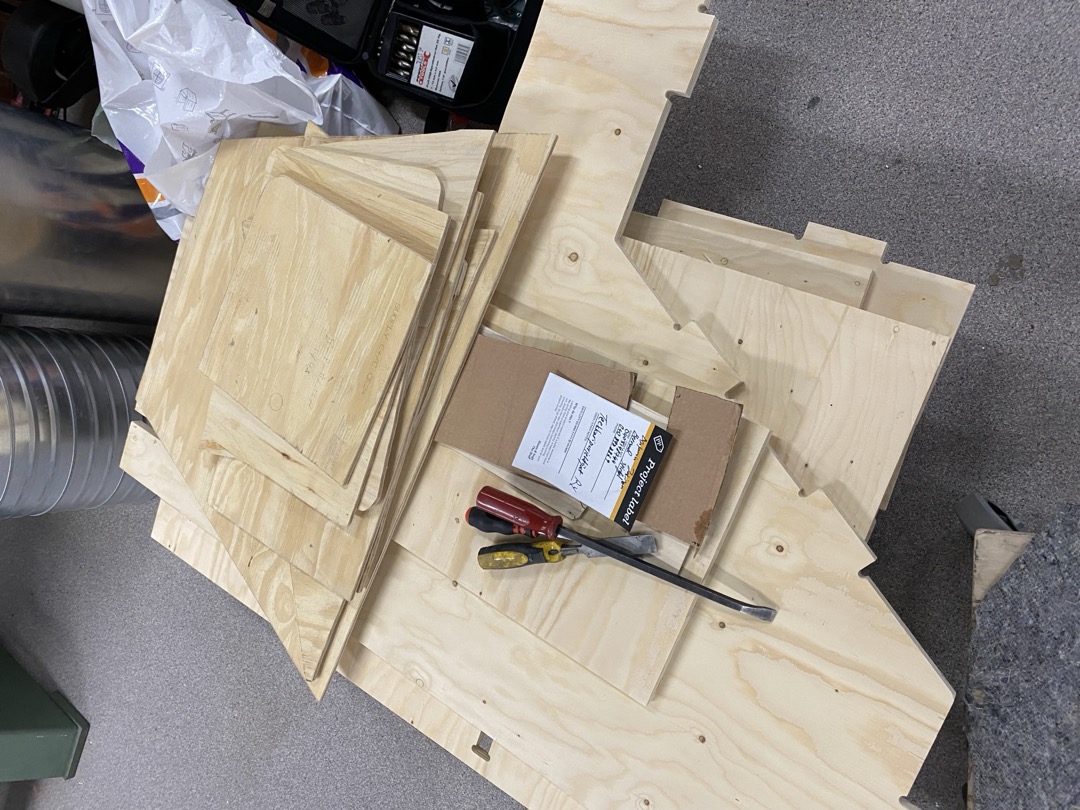
We documented and labelled all of the removable wooden parts that were taken into the workshops for sanding and re-varnishing. This way we ensured that re-assembly goes smoothly as bigger pieces were paired with their corresponding parts needed for installation, like screws, bolts, hinges, etc. The labelling system consisted of marking which part of the boat the piece comes from and all the parts were numbered, including screws and other smaller bits which we placed in bags taped to corresponding larger pieces.

Glue Stripping (March 2024)
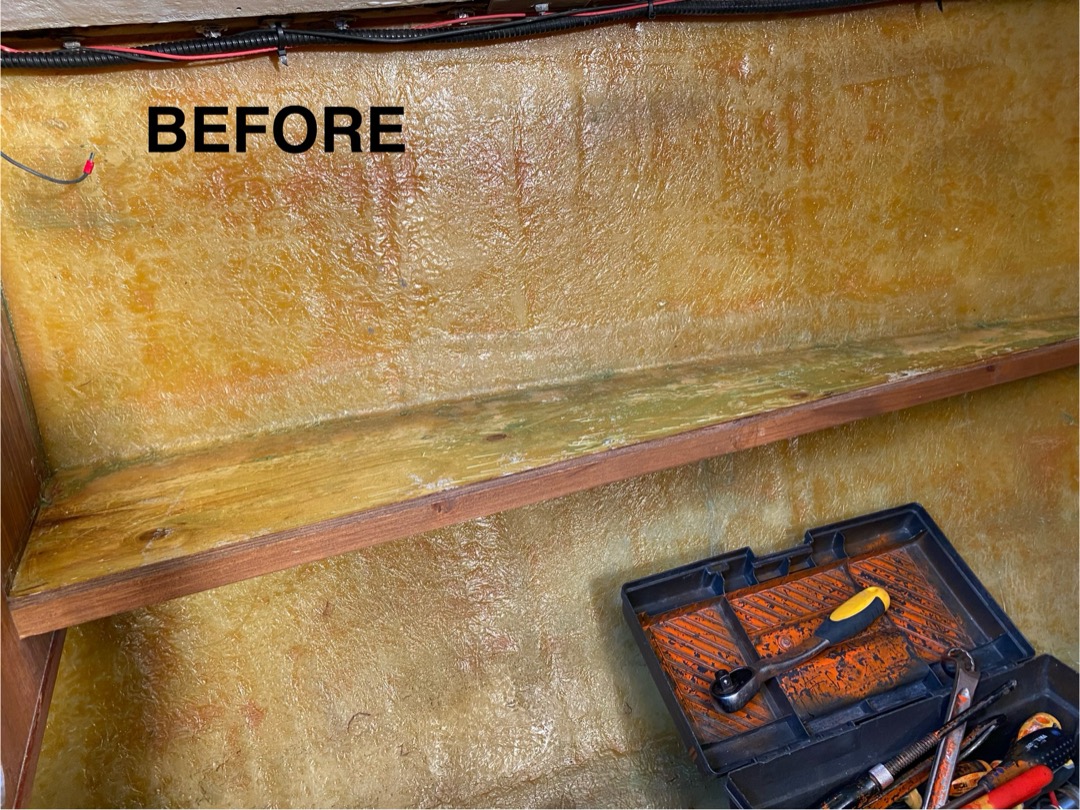
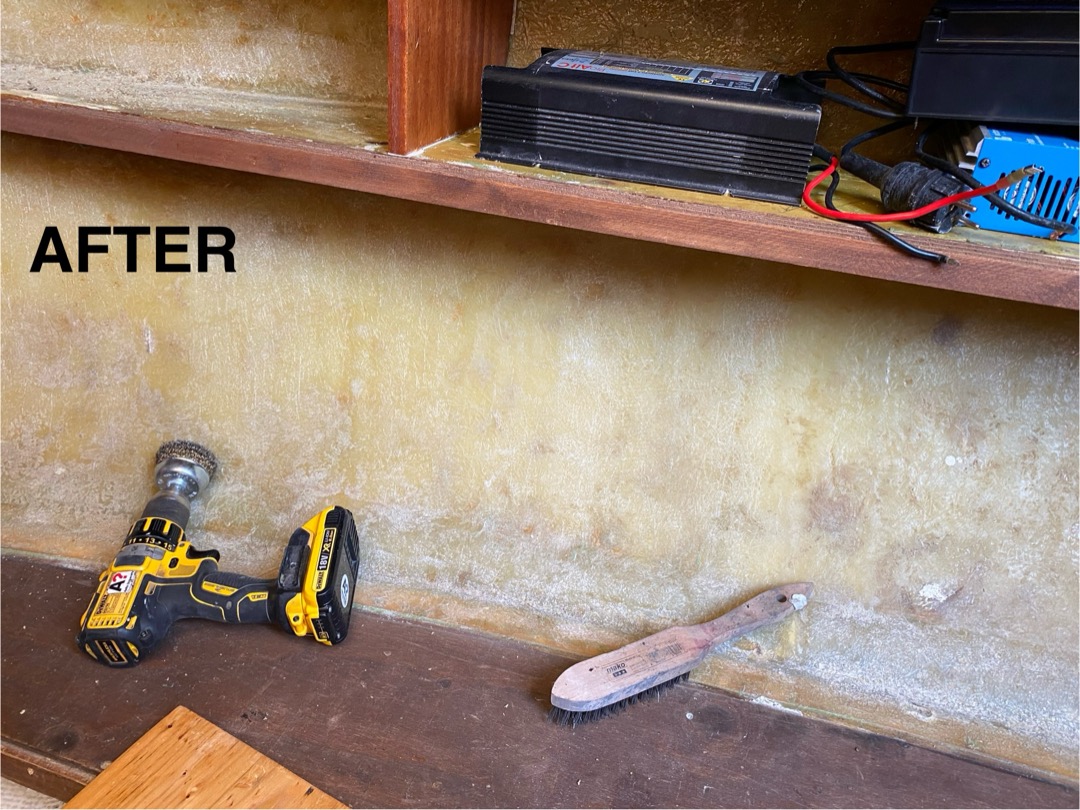
In order to treat the fiberglass hull with the new coating, we first needed to remove the glue residue and sand the surface. Initially we tried chemically treating the surface using rubbing alcohol (and acetone later) to get rid of the glue, but that did not quite work out well as the glue would soften and become less sticky only temporarily.
We then resorted to removing the glue mechanically using drills and metal brush drill bits. When doing this, make sure to wear protective equipment and a mask as fiberglass can shed in the process. Holding the drill parallel to the surface and using side of the brush proved to be more effective than pushing against the surface at 90 degrees (like when drilling). The process took significant amount of time over the course of several weeks, as we needed to remove all the glue from the hull in order for polyester topcoat to stick properly.
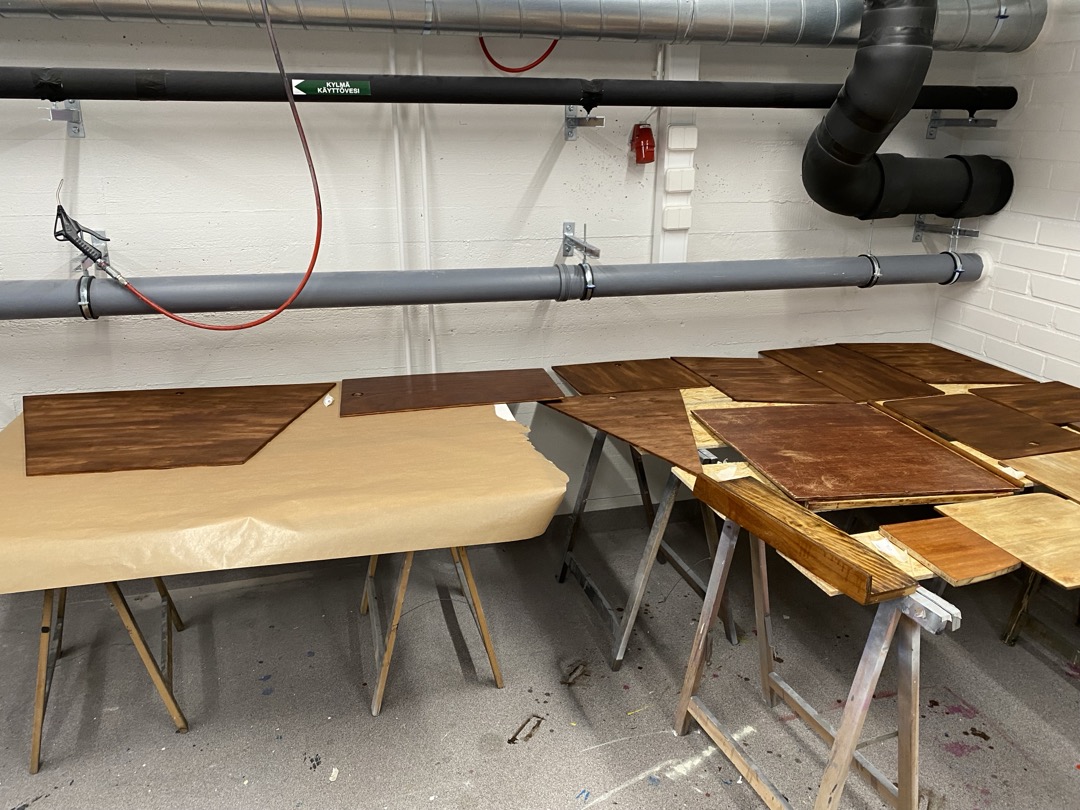
Woodwork, Sanding and Varnishing (March - May 2024)
The wood restoration process was mainly consisting of two parts - sanding and varnishing. While the process is fairly straightforward, this segment of the project was by far the most time consuming - both in terms of hands needed to complete it as well as the time required for varnish to cure.
We started by sanding down all the pieces. Bigger pieces were machine sanded, while smaller pieces and details were hand sanded. Although sanding is a fairly simple process, it's important to be careful not to over-sand the wood, especially if there is paint or detailing underneath the varnish (e.g. floorboards). Therefore, we only lightly sanded the pieces that were delicate or already in a good condition. There was also a number of pieces that were beyond repair, which we decided to replace completely by cutting out new replacement pieces.
Following the sanding and woodwork, we proceeded with varnishing. In order to make the wood colors in the boat as uniform as possible, we used TVT 232A Pigment that was mixed with transparent varnish. We applied four to five layers of varnish to interior pieces not exposed to the elements, and upwards of six layers for pieces that might get in touch with water (e.g. the pieces close to the bilge or outside handles, tiller, etc.) The pieces should be lightly sanded with high grit (high number) sandpaper between the varnish layers in order for new varnish to stick. Additionally, in order to prevent accumulation or spillage of varnish while it dries, it is good practice to dip the brush only briefly (as opposed to soaking it in varnish) and apply several thin layers, avoiding accumulations of varnish. In optimal conditions, at room temperature, the varnish cures within 24 hours. We also pushed this recommendation a bit, as pieces that we weren't able to remove from the boat had to be varnished at lower temperatures. Despite the sub-optimal temperatures, the varnish cured well. NB - we still ensured that the temperatures are above freezing, as it's generally good to avoid varnishing in sub-zero temperatures.
List of parts:
- Unica Super 60 Varnish (transparent varnish)
- TVT 232A Pigment (pre-mixed with the varnish above at the store)
- Tikkurila's Thinner 2010 (for alkyd paints)
Anti-Mould Treatment (March - April 2024)
For treating the mould infested wood, we applied a bleaching agent to the sanded down wood surface. Once applied, the bleaching agent starts to foam up if there is mould present. After applied, it should be left to act for some time and then wiped off. We repeated the process until there was no bubbling. It is also good to note that the black dots that are typical sign of mould might remain even after the procedure, since mould can destroy the wood pigment. However, that does not mean that the mould is still alive.
Bleaching agent used:
- Tikkurila's Terassi- ja Kalustepesu - Cleaning Agent (follow the instructions on the packaging for preparation)
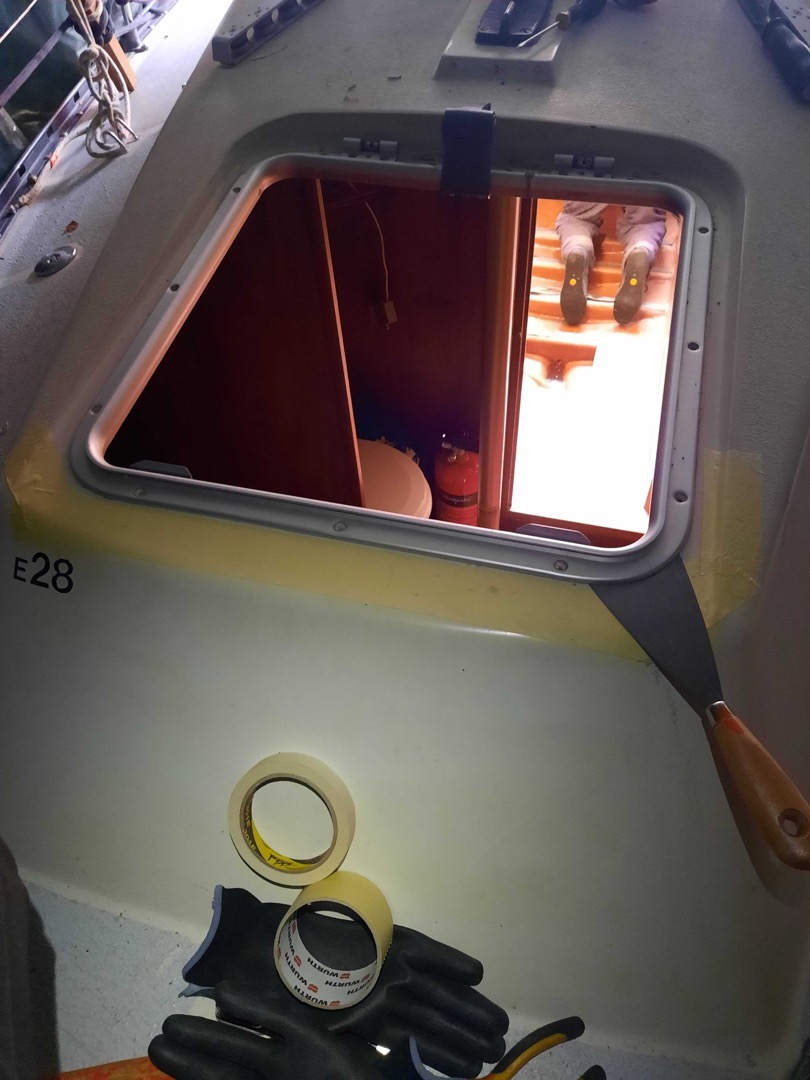
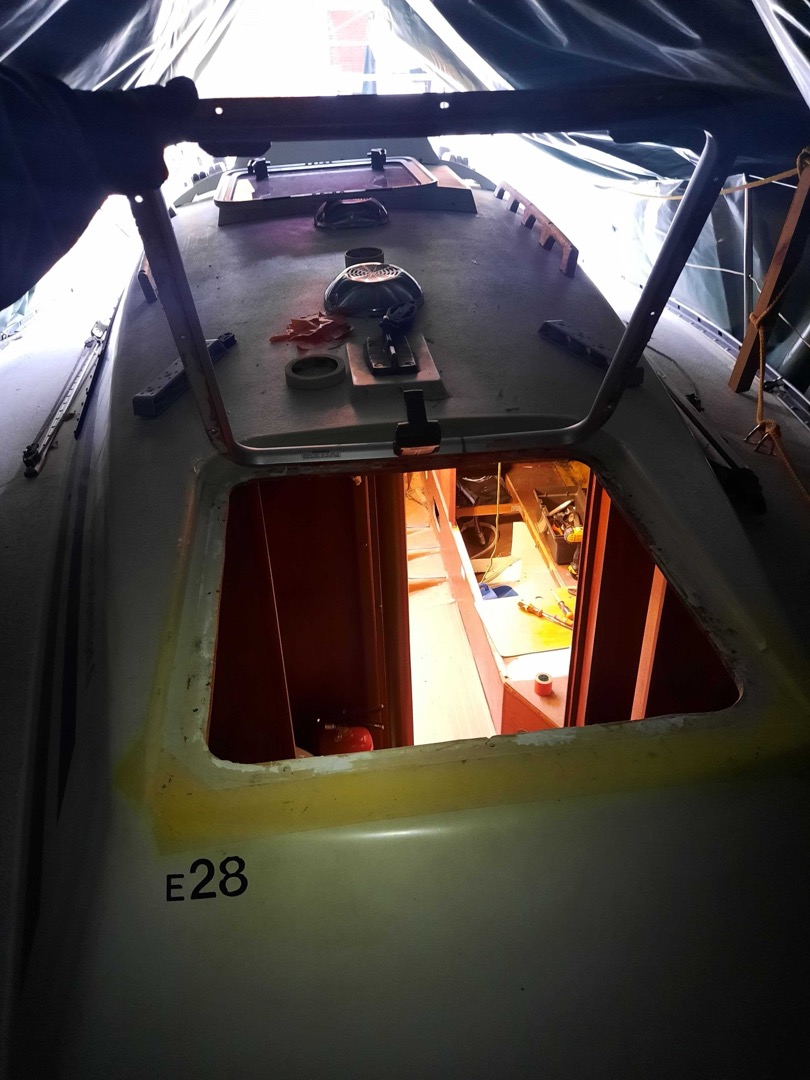
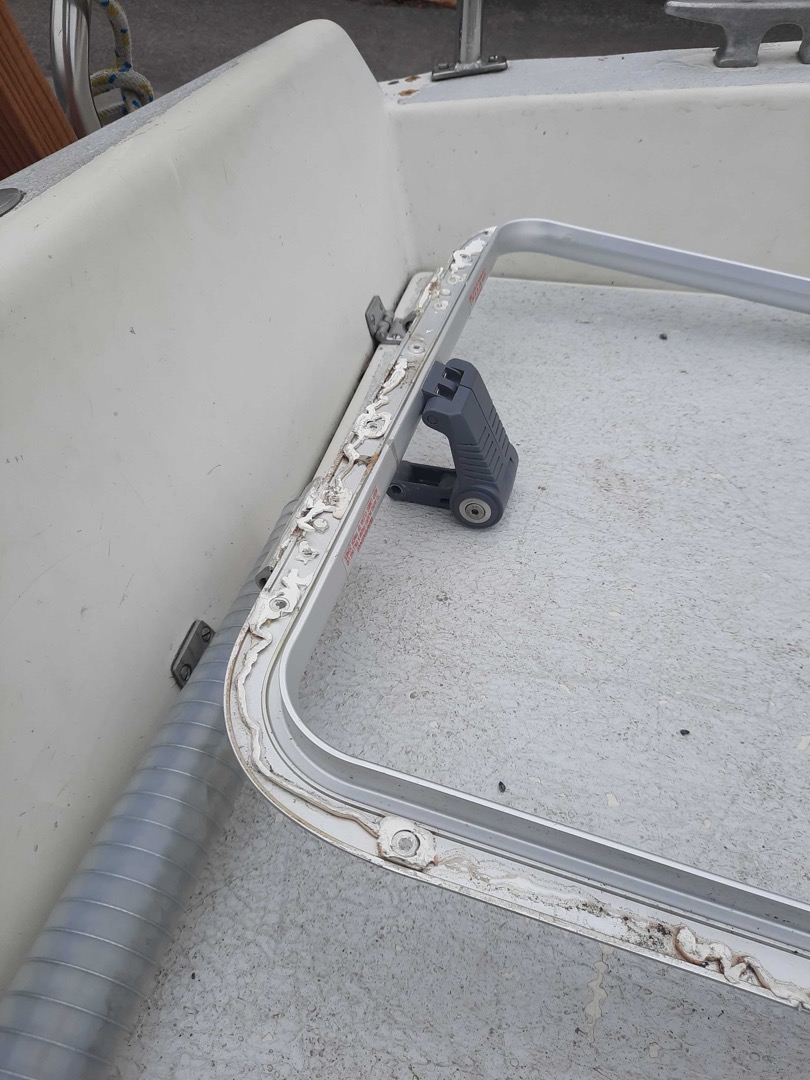
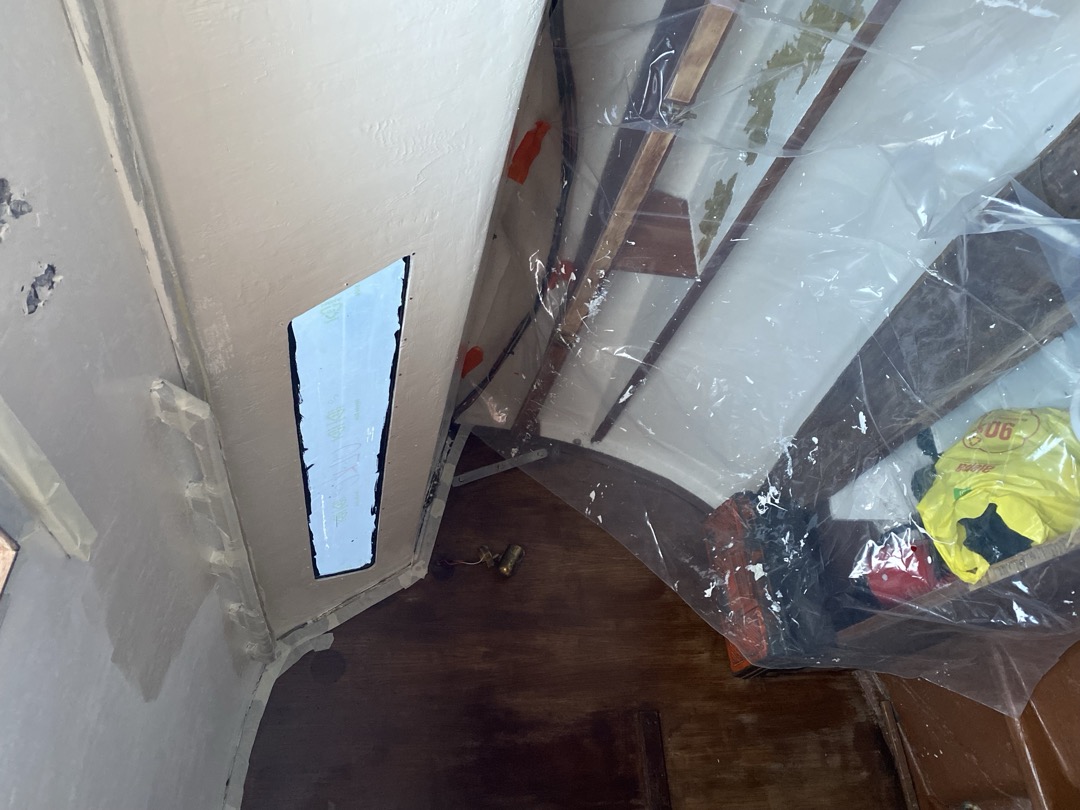
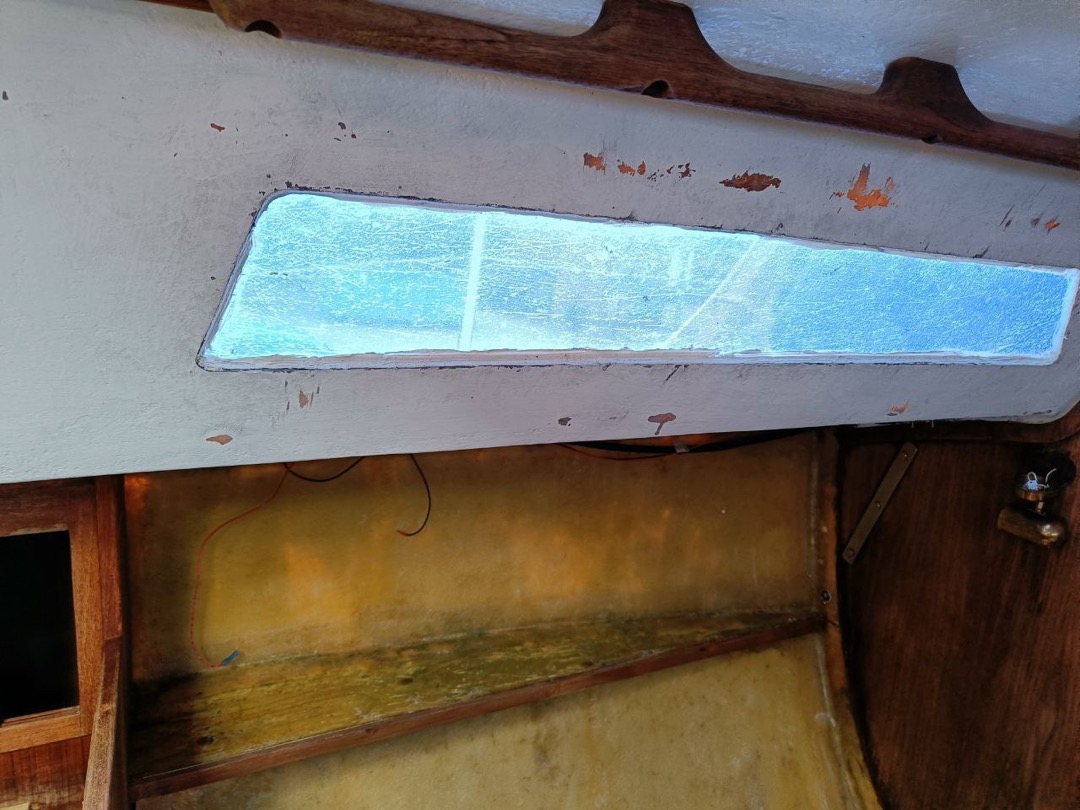
Windows and Hatch Fix (April 2024)
Windows and hatches, as well as any other parts that need to be water tight, can be quite tricky when it comes to replacement as the margin for error is non-existent. Therefore, it's usually the best to get them done in one go if possible.
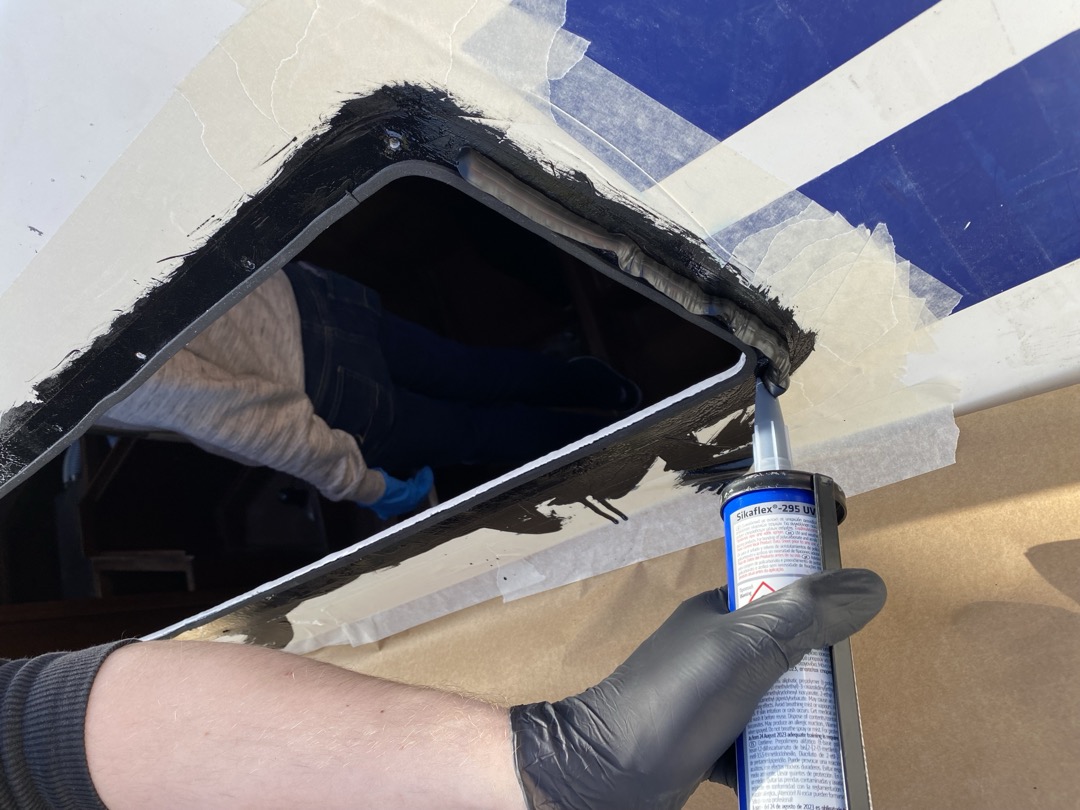
As the hatch was leaking, we detached it from the hull to redo the seal. This was the right decision, as after the hatch was off we found out the hatch was loosely attached using a thin strip of silicon. We also found several through holes which, together with the thin silicon band, were the source of the leakage. First we filled the holes using fiberglass filler, after which we applied polyester topcoat and sanded down the surface to make it level. We then replaced the seal using Sikaflex to fix the leakage. It's worth noting that using plenty of masking tape when dealing with Sikaflex is usually a good idea to prevent it from spreading in unwanted areas. Just remember to remove the masking tape before the Sikaflex fully cures.
List of parts for hatch refit:
- Soudal Polyfiber Fiberglass Filler
- Sikaflex 291i
- White Pakla Polyester Topcoat (Polyesterihartsi)
- Polyester Topcoat Hardener (mix 1-2% w.r.t. the topcoat amount)
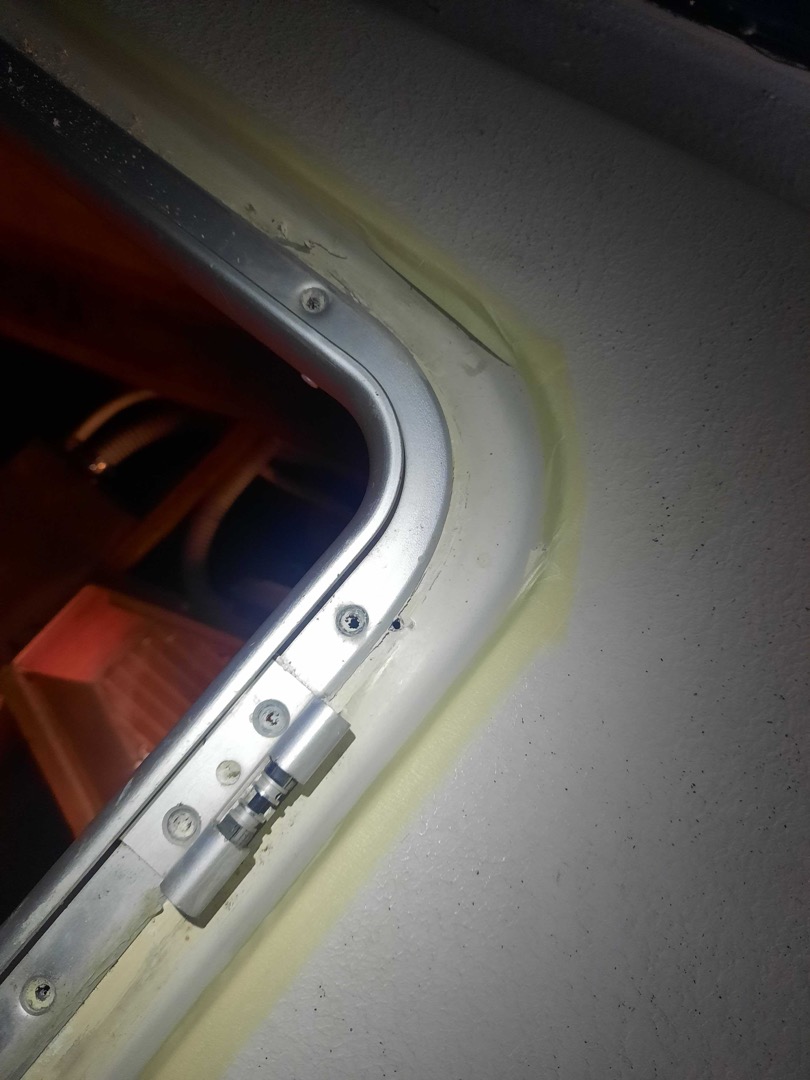
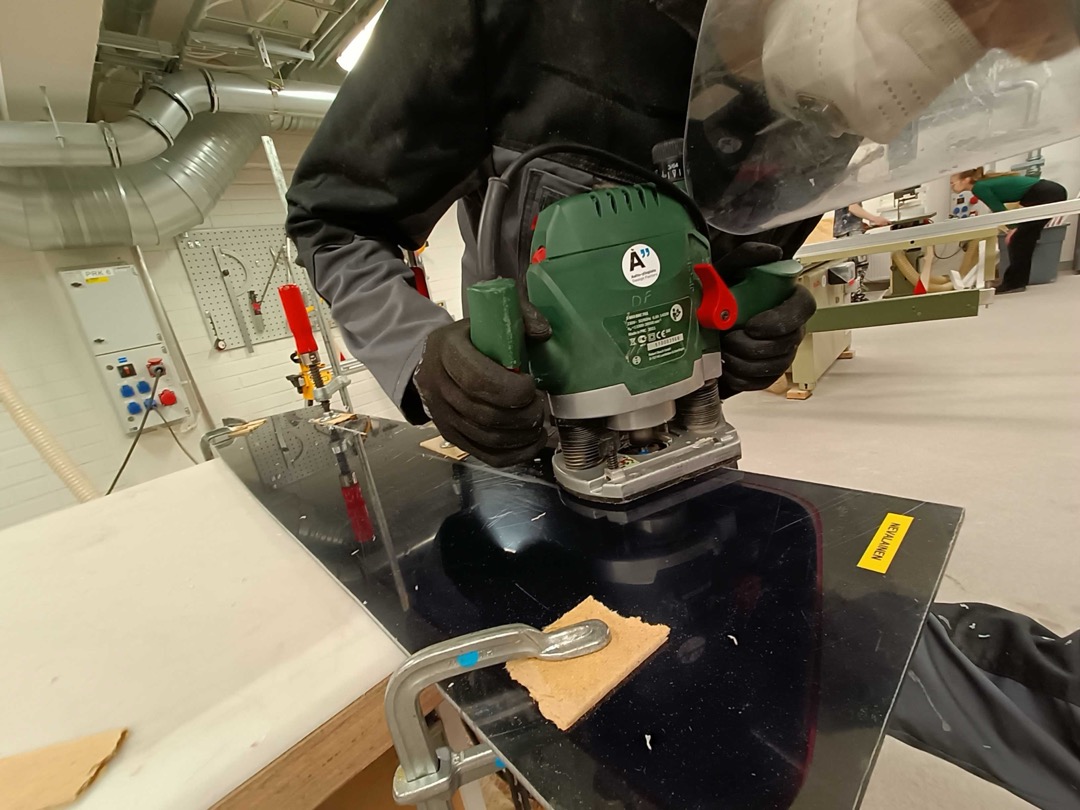
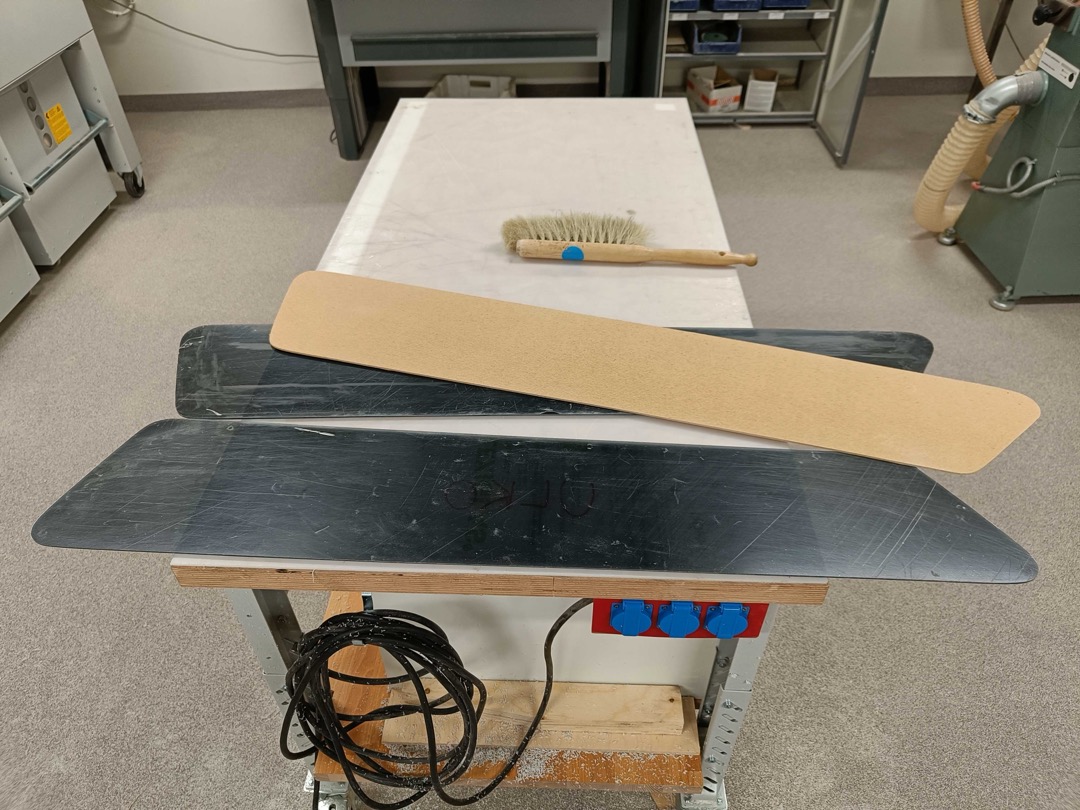
Understanding steps for window replacement was fairly straightforward (actual execution was something else) thanks to a really thorough guide provided by the FE83 community that can be found here (only in Finnish). Once we ordered all the necessary pieces, we proceeded with detaching the old windows, which we then used as a model for cutting the new ones.
The acrylic (plexiglass) sheet usually comes with a protective film, it's a good idea to leave it on until the very end of the installation process to prevent any scratching or other damage. The sheet was 6mm thick in smoky gray color. To cut it, we used a bit cutter with a flush trim bit, using the old windows as a model. In addition to cutting, we drilled the screw holes using a pillar drill. When drilling make sure to go slow and incrementally to allow for thermal expansion of the acrylic and prevent the pane from cracking. Finally, we stripped the protective film from the inner edges of the window, i.e. in the area where the sikaflex is supposed to stick.
To install the windows, we first sanded down the surfaces around the window opening and covered the edges with masking tape. We then applied the sika primer to both the boat end and the new windows, and to prevent the sika from "spilling" over to the inside, we added the rubber sealing strip around the edges of the opening (see leftmost photo below). Once that was done, the window was ready to be pressed in place. We carefully aligned the window and made sure to press against the sealing strip, in a way that sika spreads out towards outside and onto the masked area. Once the window was firmly in place, we kept it pressed and installed the screws. The masking tape should be removed carefully shortly after installation, before the sika cures.
List of parts for window replacement:
- Acrylic (Plexiglass) Sheet (enough for 2x 120x50cm, 6mm thickness)
- Sika Primer 209D
- EPDM Sealing Strip, 3mm thickness
- Sikaflex 295 UV

Topcoat (May 2024)
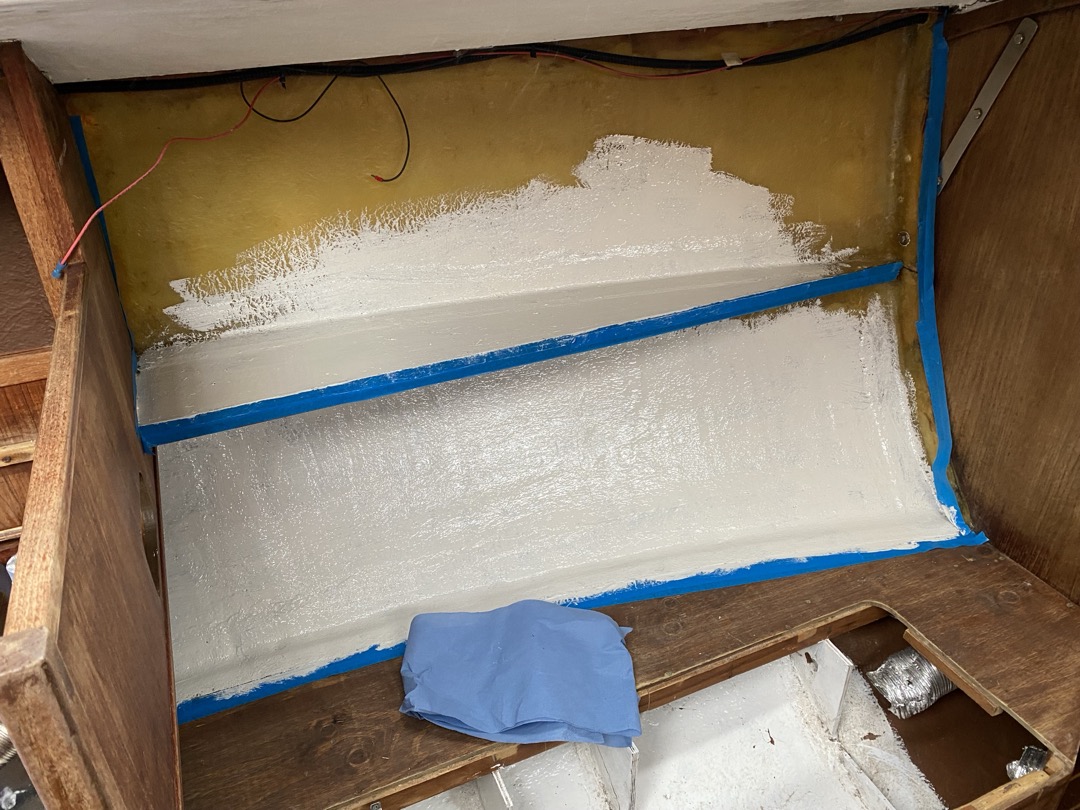
We decided to treat the bare fiberglass with polyester topcoat, as it was a good and easy to maintain long-term solution. (Another similarly good option, which we learned about later, is sprayable cork.) Before working with topcoat, make sure to cover and protect all the surrounding areas using masking tape (should be carefully removed before the topcoat cures), plastic covers, etc.
We prepared the topcoat using a scale to measure the ratios. Due to quick curing time (15-20 min) in recommended conditions, we usually prepared it in batches of couple hundred grams, mixing in 1-2% of the hardener with respect to the polyester amount. Once cured, the topcoat basically becomes a solid piece of plastic. For this reason, it's good to use disposable plastic container and wash the brushes immediately after application using thinner, before the topcoat has a chance to cure (if the topcoat cures on the brush, you can throw it away :')).
When applying the topcoat, ensure that the temperature is around 15-20 °C (lower temperatures can signficantly extend the curing time, from normal 15-20 min to upwards of more than 24h). The topcoat should be applied in generous amounts using a brush. Note that topcoat is not paint and it's usually good to apply thicker layer than what you'd normally do with paint.
Ingredient list:
- White Pakla Polyester Topcoat (Polyesterihartsi)
- Polyester Topcoat Hardener (mix 1-2% w.r.t. the polyester amount)

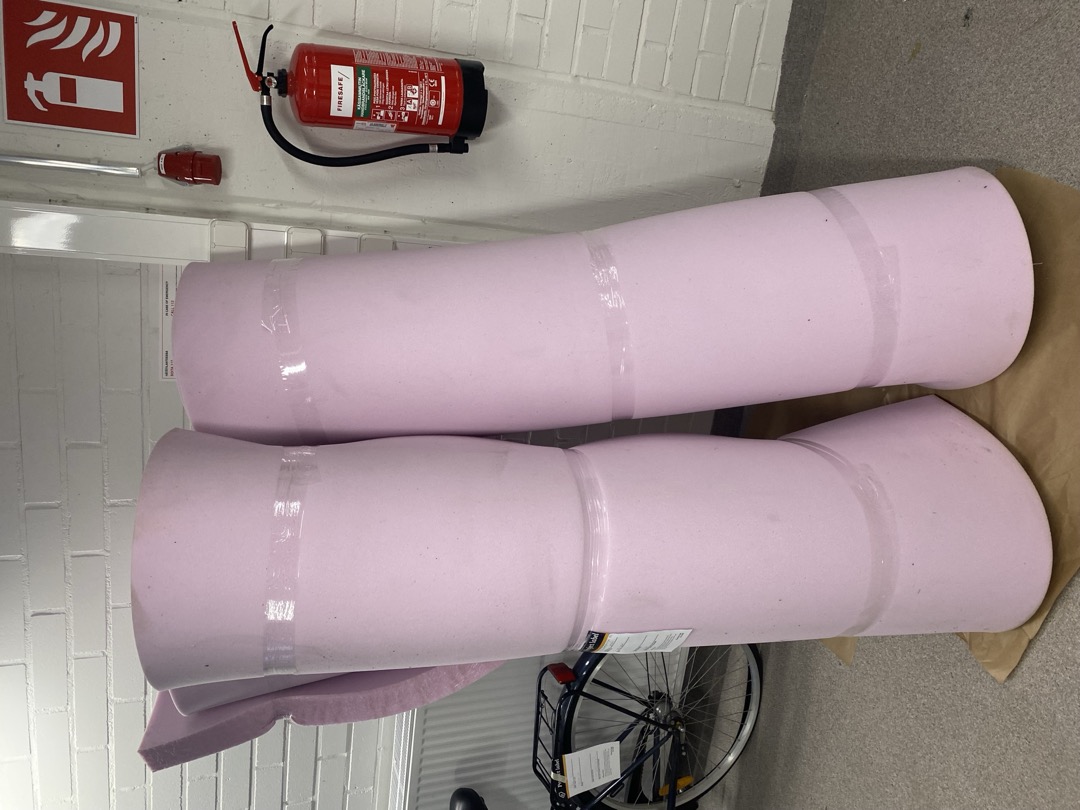
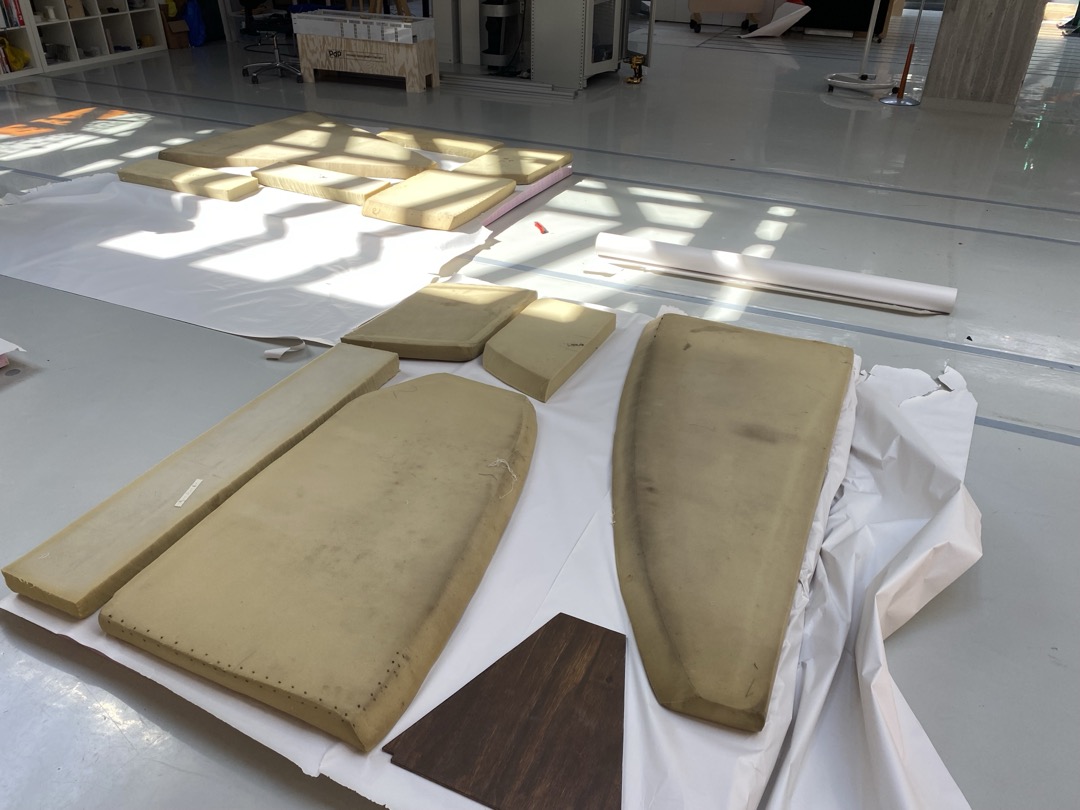
Mattresses (May 2024)
For renewing the mattresses, we ordered three, relatively dense foam sheets with dimensions of 160x200x7cm.
We started by laying out the old cushions on top of the new foam sheets and tracing them onto the new foam sheets, with the goal of using the least amount of foam needed.
To cut the new pieces, we first used the hot wire cutter, but quickly abandoned it as cutting was slow and the cuts were not very clean. Instead, we decided to try using the band saw in wood workshop, which ended up surprisingly well, producing precise cuts very quickly and effortlessly (see video below for showcase).
Mattresses:
- 3x 160x200x7cm HR42 Foam
Miscellaneous Fixes
The comprehensive refurbishment project was also a good opportunity to fix a bunch of smaller things in the boat, probably too many to count. Undoubtedly, there are still many quality of life fixes that can be done on the boat, and fixing up small things is pretty much a never ending job.
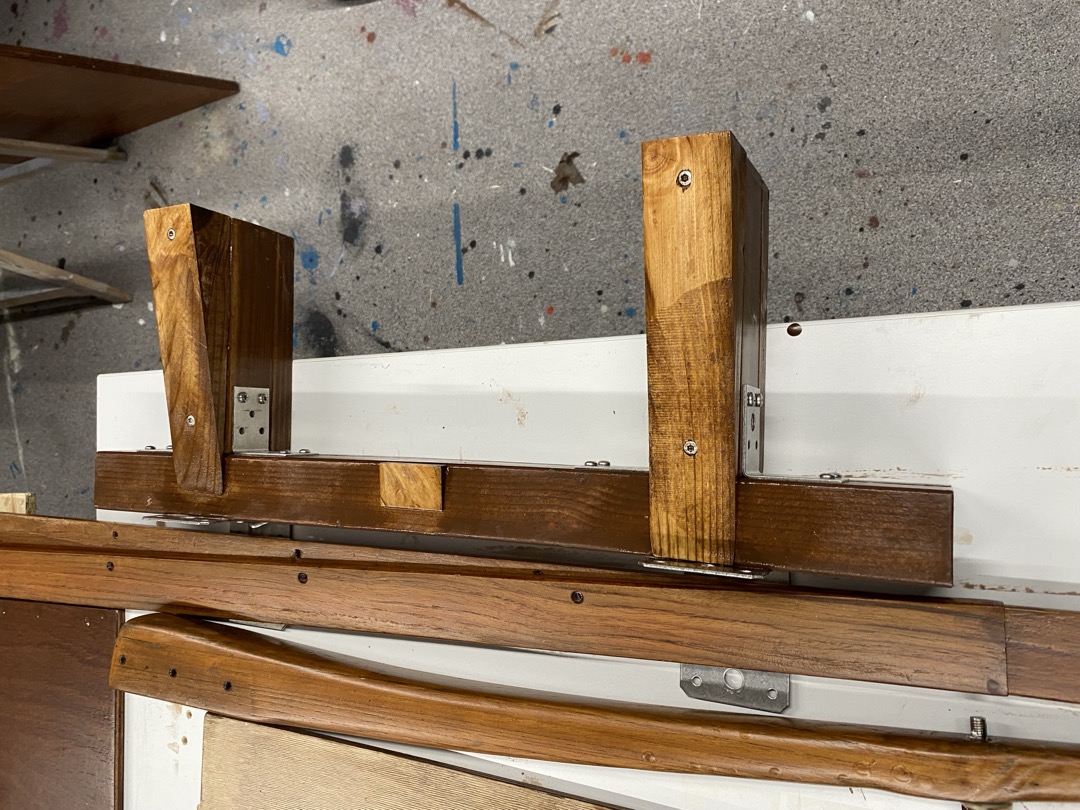
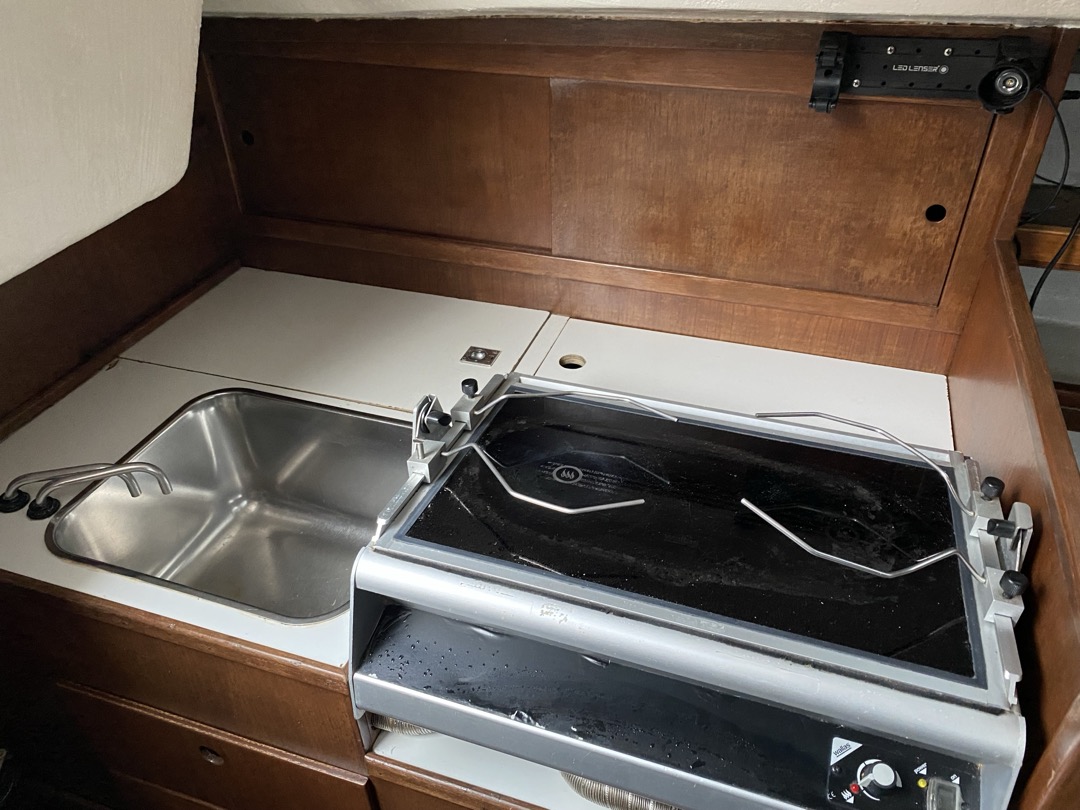
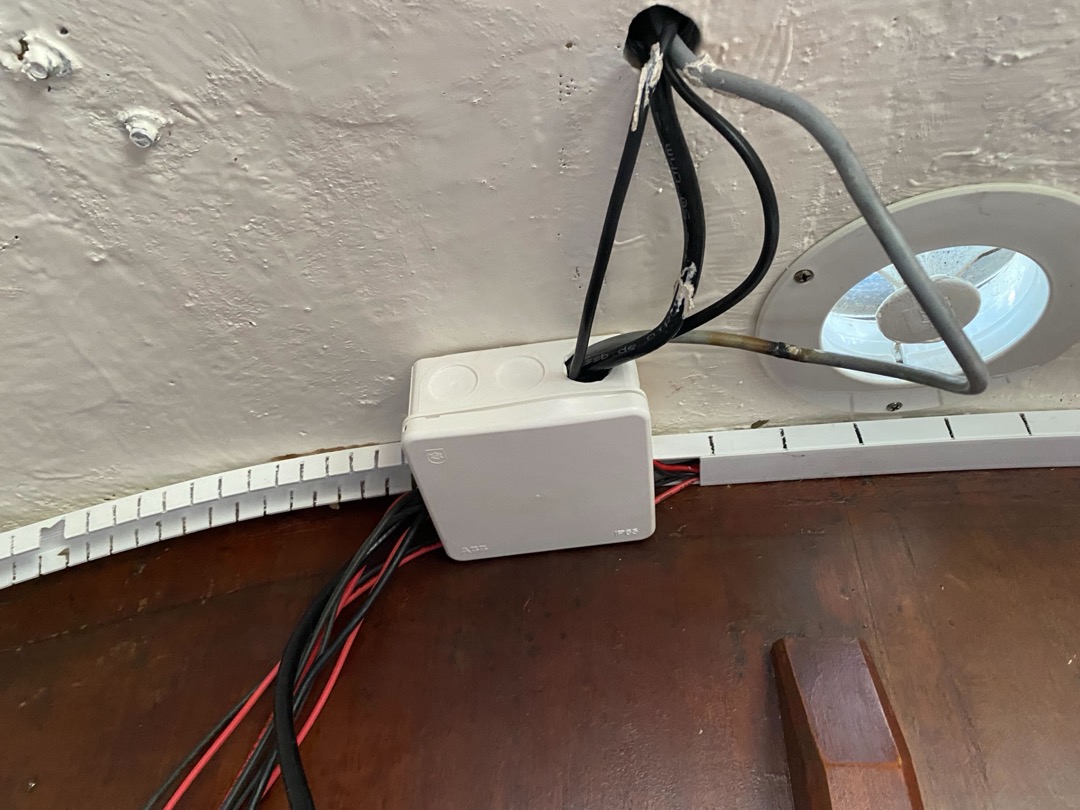
Some of the bigger fixes included (photos from top to bottom, left to right) re-varnishing and cleaning exterior pieces (tiller, handles, mainsail traveller, etc.), deep cleaning the stove and galley area, replacing old electrical box and changing connectors (to Wago clip on, lever connectors), replacing the anti-skid tape on the entrance ladder, fixing the fridge cover which had fallen apart (we created a replacement out of scrap plastic, and used hot glue to hold it together, which didn't end up being too durable) and finally, cleaning and fixing the light fixtures inside the boat.

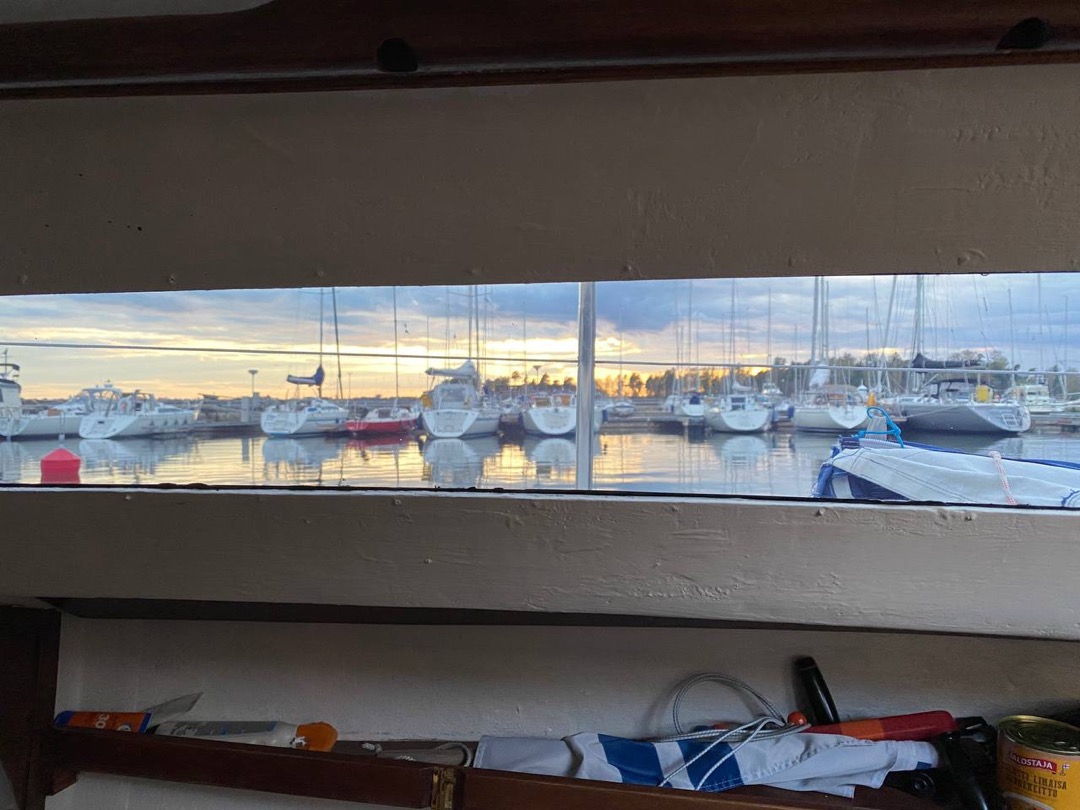
Launch
On 13th of May 2024 the boat finally left Design Factory. We took it from Otaniemi to Koivusaari for masting and finished the day at home harbour in Ruoholahti. Below you can find some footage from that day :-)
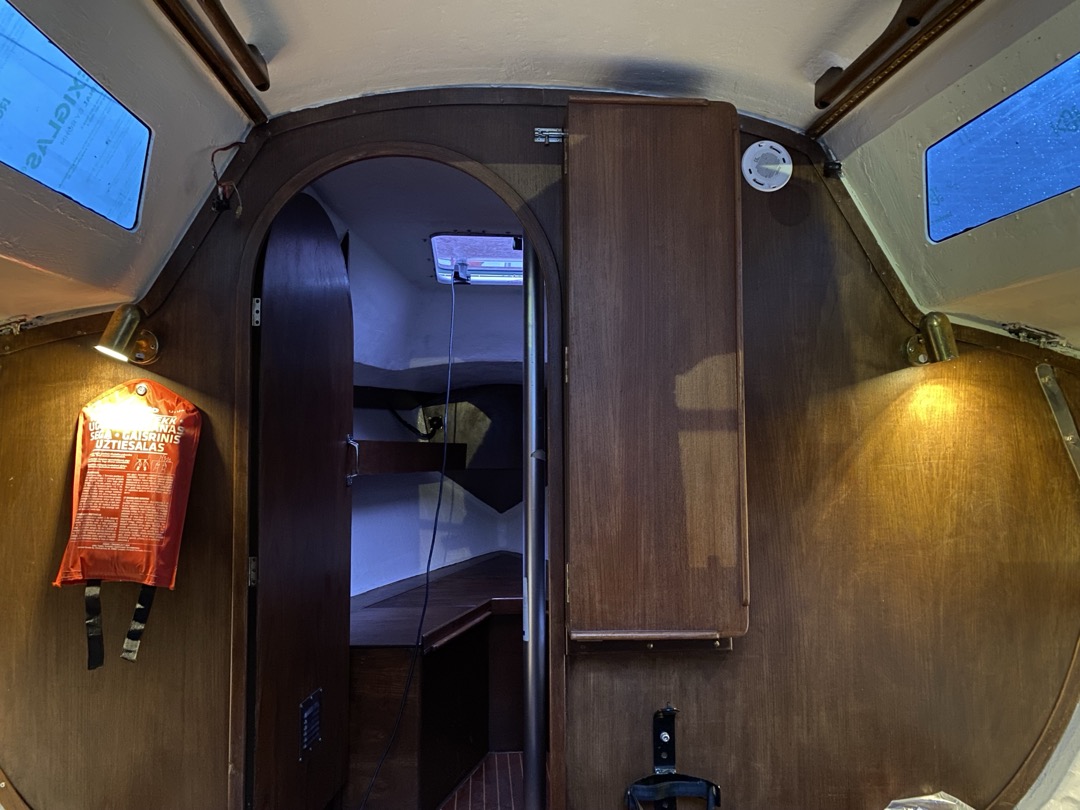
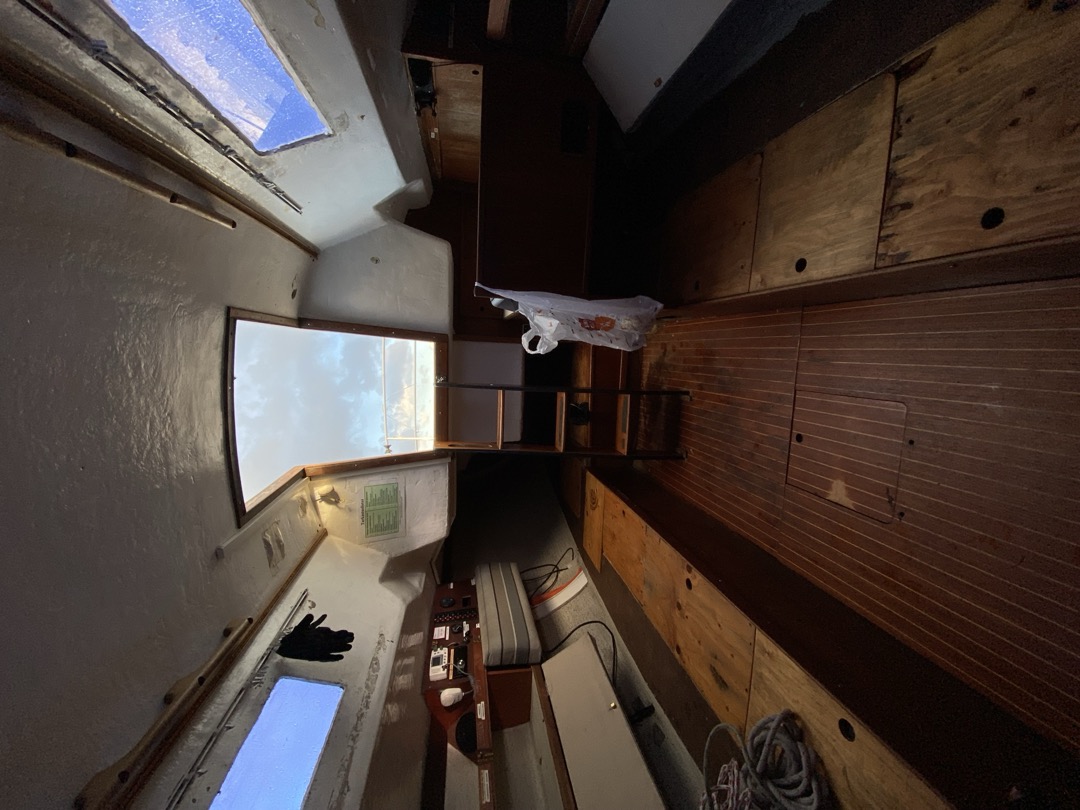
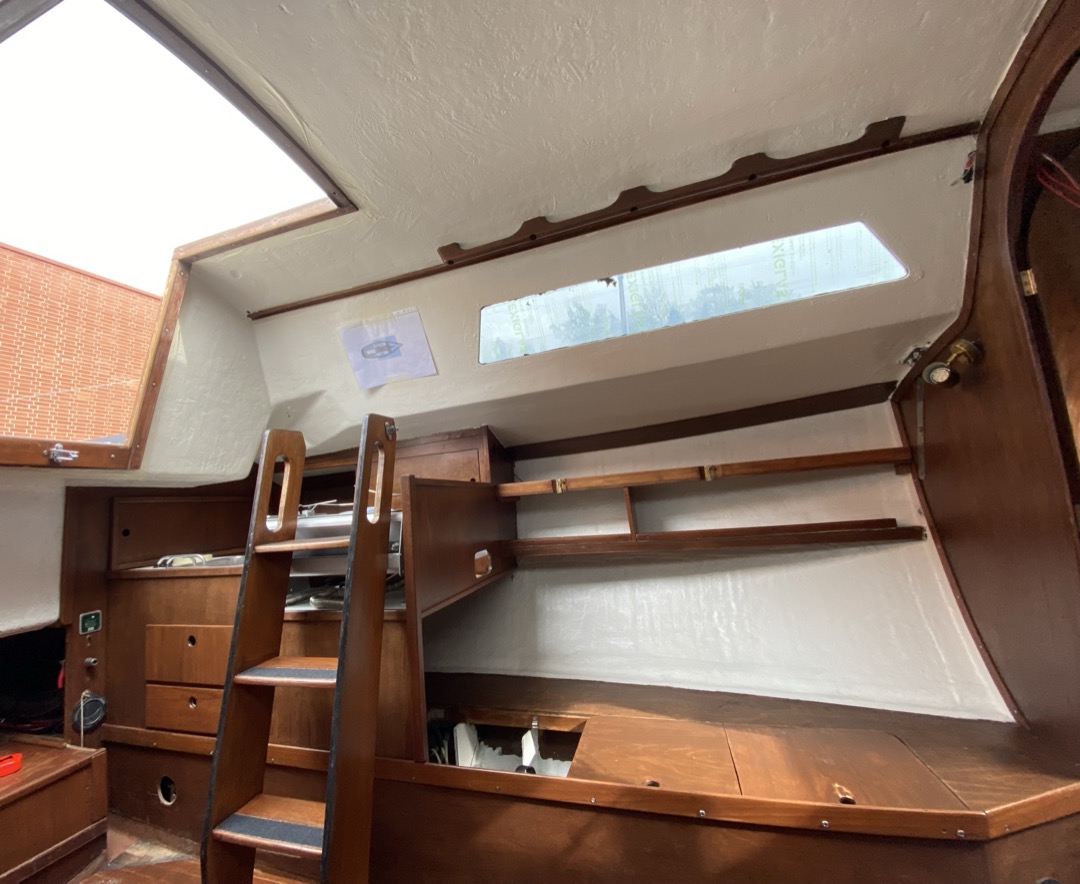
Before / After
Galley and Saloon
Windows
V-Berth
Engine Compartment (Batteries)
Us


Project in Numbers
The total running time of the project (excluding breaks) was around 6 months and involved participation of over 40 club members (most rotating over the course of 6 months). The execution took upwards of 1000 human-hours with manual work like sanding, varnishing and glue removal accounting for a significant percentage. Between March 2024 and mid-May 2024, we ran the talkoos every weekend with no exceptions (sometimes both Saturday and Sunday). The talkoos intensified significantly towards the end of the project, and we ran them daily just before the launch, during the last week of the project.
Acknowledgements
We would like to thank Aalto Design Factory for facilitating the project in their premises and providing all the necessary equipment. We extend our gratitude to Oceanvolt for assistance with battery installation and troubleshooting as well as to WB-Sails for providing extensive information prior to sail purchase and assitance with repairs. Lastly, we thank TTER for providing funds which enabled the sail renewal.